
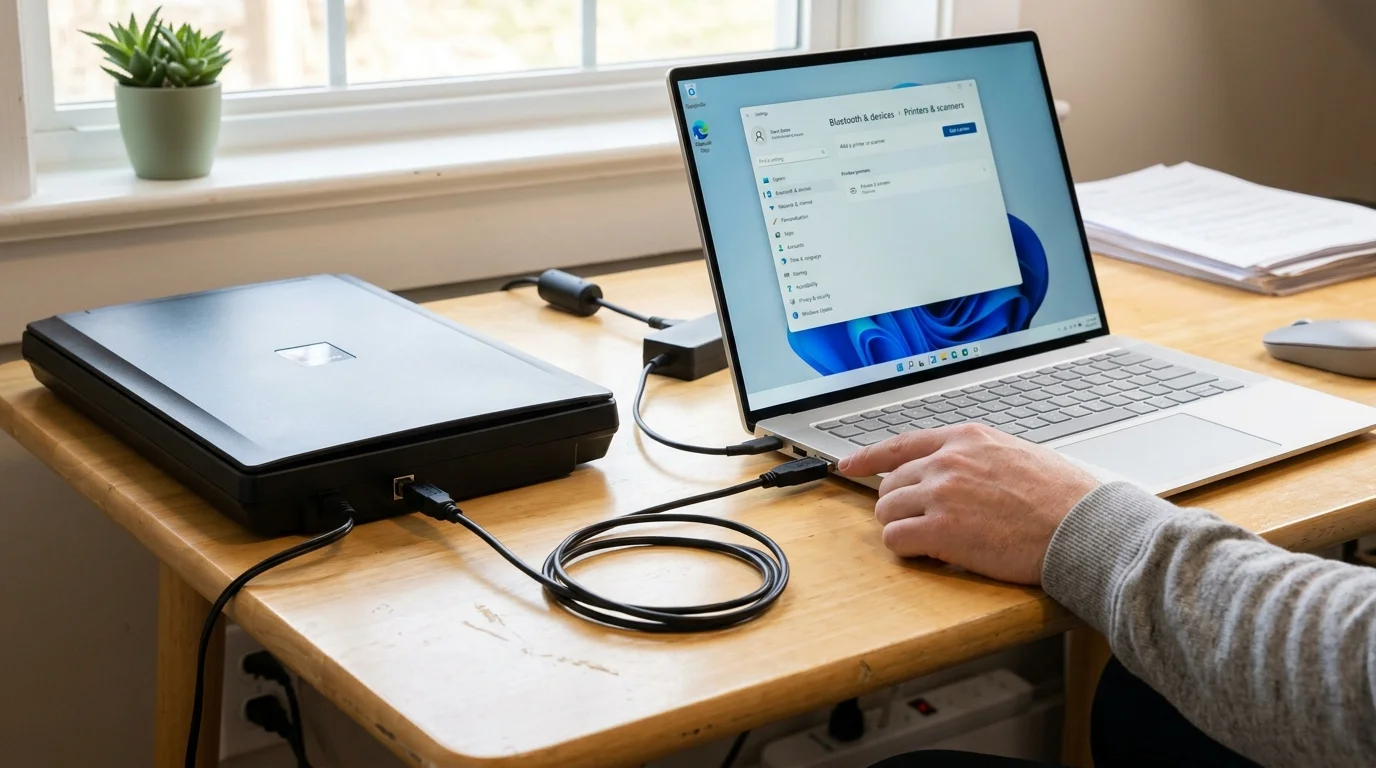
Connecting a scanner to your Windows computer doesn’t have to be complicated. Whether you’re using Windows 10 or the newer Windows 11, the process has become much simpler over the years. Modern Windows systems automatically find scanners, install drivers without asking you for anything, and provide built-in apps ready to use immediately.
In 2026, you have three main ways to connect scanners:
- USB scanners – You plug them directly into your computer
- Wireless scanners – They connect through your WiFi network
- Network scanners – Usually found in offices, they work through your internet connection
This guide covers all three methods in simple language. You’ll also learn how to fix common problems and how to connect a scanner properly. By the end, you’ll know exactly what to do when you unbox your new scanner.
Why This Matters in 2026
Scanner technology hasn’t changed dramatically, but Windows has become smarter at connecting devices. Windows 11 now finds scanners faster than ever. It automatically installs the right drivers without you hunting through manufacturer websites. Built-in scanning apps like Windows Scan have also improved, making it easier to digitize documents.
If you’re working from home (as many people do in 2026), having a working scanner is often necessary. You might need to scan receipts for accounting, sign documents from banks, or digitize important paperwork. A proper setup takes minutes but saves hours of frustration.
Part 1: Connecting a USB Scanner to Windows
What You’ll Need
- A USB scanner
- A USB cable (usually included with your scanner)
- A Windows 10 or Windows 11 computer
- An available USB port (USB 3.0 is fastest, but USB 2.0 works fine)
Step-by-Step USB Connection Guide
Step 1: Prepare Your Scanner
Before plugging anything in, unpack your scanner completely. Remove any protective plastic or cardboard. Look for a power button and make sure your scanner has batteries (if wireless) or a power adapter (if USB). Read the quick start guide—manufacturers often include useful information.
Step 2: Connect to Your Computer
Locate a USB port on your Windows computer. Modern laptops have USB-C ports, while older computers have traditional USB-A ports. If your scanner uses a different connector, check if an adapter came in the box. Plug the scanner’s USB cable into your computer’s USB port.
Step 3: Turn On the Scanner
Press the power button on your scanner. You’ll usually see a light come on. Wait about 10-15 seconds. Windows automatically detects new devices when you connect them. You might see a notification in the lower right corner saying “Installing drivers” or “Device found.”
Step 4: Let Windows Install Drivers
Windows 11 is extremely good at automatically finding the right drivers for your scanner. You usually don’t need to do anything—just wait. The whole process takes 30 seconds to 2 minutes depending on your internet speed. Drivers are small software files that tell Windows how to talk to your scanner.
Step 5: Open Settings to Verify
Click the Windows Start button (bottom left corner). Type “Settings” and press Enter. Once Settings opens:
- Click “Bluetooth & devices” on the left side
- Look for “Printers & scanners”
- Scroll down in the main area
- Your scanner should appear in the list
If you see your scanner listed, congratulations—it’s connected and ready to use.
Step 6: Test Your Scanner
Now test that everything works. Search for “Windows Scan” in the Start menu. When it opens, click “New scan” (or the camera icon). Your scanner should appear in a dropdown menu. Select it and try scanning a document. If a scan preview appears, your setup is successful.
Why USB Scanners Are Popular
USB scanners are the most straightforward option because they don’t depend on WiFi. They work immediately, scan at full speed, and rarely have connection problems. They’re perfect for home offices and small workspaces where the scanner sits near your computer.
Part 2: Connecting a Wireless Scanner to Windows
What You’ll Need
- A wireless scanner (WiFi-enabled)
- Your WiFi network name and password
- A Windows 10 or Windows 11 computer on the same WiFi
- Power outlet near the scanner (wireless scanners need power)
Step-by-Step Wireless Connection Guide
Step 1: Connect Scanner to WiFi First
Most wireless scanners have a setup menu. Look for buttons on the scanner itself, or check the manual for where to find the WiFi setup option. On many models, you hold down a button for 3 seconds to enter WiFi mode. The scanner displays available networks on its built-in screen.
Select your home or office WiFi network from the list. Enter your WiFi password carefully—wireless scanners are picky about passwords. If you make a mistake, the scanner won’t connect.
Your scanner will display a confirmation message once it connects to WiFi. This usually takes 20-30 seconds. Don’t turn off the scanner or WiFi during this time.
Step 2: Make Sure Your Computer is on Same WiFi
Your Windows computer must be on the exact same WiFi network as your scanner. If you’re on your phone’s hotspot instead of your home WiFi, the scanner won’t find your computer.
To check your WiFi connection on Windows, click the network icon (bottom right corner). Make sure you’re connected to the right network name.
Step 3: Open Windows Settings
Click the Windows Start button and open Settings. Go to “Bluetooth & devices” and then “Printers & scanners.” This is where Windows lists all connected scanning devices.
Step 4: Add Your Scanner
Look for a button that says “Add device” or “+ Printers & scanners.” Click it. Windows will search for nearby scanners on your WiFi network. This search usually takes 10-30 seconds.
A list of available scanners will appear. You’ll see your scanner’s name (check the manual or look at the scanner’s screen to find its name). Click your scanner in the list.
Step 5: Wait for Driver Installation
Just like with USB scanners, Windows automatically installs drivers. If your computer is connected to the internet, drivers download in the background. Once installation completes (usually 1-3 minutes), your scanner is ready.
Step 6: Test the Connection
Open Windows Scan again. In the dropdown menu, your wireless scanner should now appear. Select it and try scanning something. Wireless scanners scan slightly slower than USB (because data travels over WiFi), but it should complete within a few seconds.
Why Wireless Matters in 2026
Many workplaces now have shared scanners that everyone uses. Wireless scanners let you scan from any device in the building—your laptop at your desk, a tablet in a meeting room, or someone else’s computer across the office. No cables required. You just connect to WiFi and scan.
Wireless is also better for people who move their scanners around or have a desk that’s far from their computer.
Part 3: Using Network Scanners (Office/Enterprise)
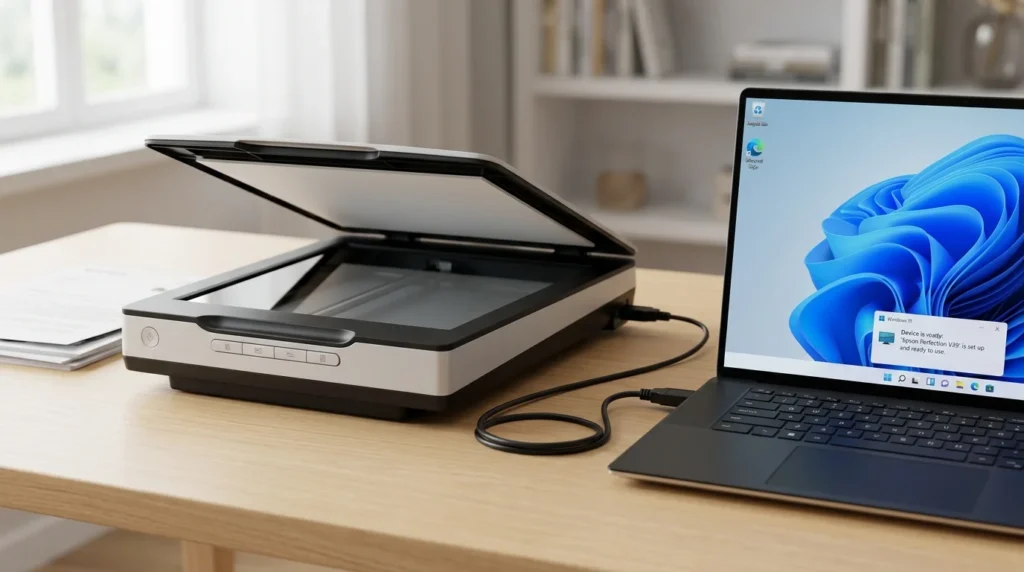
Network scanners are large multifunction devices in offices. They’re connected to the company network, not to individual computers. If you work in an office, your scanner might fall into this category.
Connecting to a Network Scanner
Step 1: Ask Your IT Department
Network scanners usually need special setup by IT staff. The process is more technical and involves network permissions. Contact your IT department to get added to the scanner’s approved users list.
Step 2: Get the Scanner’s Network Address
Your IT team will give you the scanner’s network address (called an IP address, like 192.168.1.100). This is how your computer finds the scanner on the network.
Step 3: Add to Windows
Open Settings → Bluetooth & devices → Printers & scanners → Add device. Instead of letting Windows search automatically, click “Add a printer or scanner manually.” Enter the IP address your IT team gave you.
Step 4: Install Required Software
Many network scanners need special software from the manufacturer. Your IT team will either install this remotely or give you instructions. This software lets you access advanced scanner features.
Network Scanner Advantages
- Shared by entire office team
- Handles large scanning jobs
- Advanced features like automatic document feeding
- Professional-quality results
- Integrates with office systems
Comparison Table: Scanner Types Explained
| Feature | USB Scanner | Wireless Scanner | Network Scanner |
|---|---|---|---|
| Setup Time | 2-5 minutes | 10-15 minutes | 30+ minutes (IT involved) |
| Setup Difficulty | Very easy | Easy | Moderate to hard |
| Speed | Fast (immediate) | Moderate (WiFi dependent) | Fast (office grade) |
| Best For | Home, personal use | Small offices, shared desks | Large offices, teams |
| Cost | $100-$400 | $200-$600 | $1,000-$5,000+ |
| Connection Issues | Very rare | Occasional WiFi drops | Rare (IT manages) |
| Scan Quality | Good | Good | Excellent |
| Number of Users | One computer | Multiple on WiFi | Entire office |
| Power Requirements | USB power only | Needs outlet | Needs outlet |
| Portability | Easy to move | Can move around | Stays in one place |
| Learning Curve | None | Minimal | Requires training |
Part 4: Which Scanning App to Use
Windows includes two built-in scanning applications. Both work with all three scanner types. Choosing between them depends on what you’re scanning.
Windows Scan – Simple and Quick
Best for: Quick document scans, individual photos, receipts, simple jobs
Pros:
- Clean, modern interface
- Works instantly
- Saves files in common formats
- Mobile app available too
- No learning needed
Cons:
- Limited advanced options
- Can’t scan multiple pages at once
- Basic editing only
How to Use:
- Search “Windows Scan” in Start menu
- Click “New scan”
- Select your scanner from dropdown
- Place document on scanner
- Click “Scan”
- Choose save location
- Done in seconds
Windows Fax and Scan – More Powerful
Best for: Multiple-page documents, receipts you want to organize, professional scanning
Pros:
- Handles multi-page documents
- Better file organization
- More quality settings
- Can save as searchable PDFs
- Professional features
Cons:
- Older interface (less modern looking)
- More options can be confusing
- Takes longer to learn
How to Use:
- Search “Fax and Scan” in Start menu
- Click “New scan” button
- Select scanner
- Adjust settings if needed (resolution, color)
- Click “Scan”
- Repeat for multiple pages
- Save all pages as one document
Third-Party Scanning Apps
Many scanner manufacturers include their own apps. These often provide additional features like automatic document detection, OCR (text recognition), or cloud backup. Check your scanner’s manual for the manufacturer’s recommended app.
Popular choices include:
- Adobe Scan – Great for turning document photos into PDFs
- Microsoft OneDrive – Scans and saves to cloud automatically
- Manufacturer apps – Canon CaptureOnTouch, Epson ScanSmart, etc.
Part 5: Troubleshooting When Things Go Wrong
Even with good setup, sometimes things don’t work perfectly. Here’s how to fix common problems.
Problem 1: Scanner Won’t Appear in Windows
Symptoms: You plug in your USB scanner or connect to WiFi, but Windows doesn’t find it.
Solutions:
- Check the cable – Try a different USB port. Some ports have issues. If the cable is old, borrow another cable to test.
- Restart both devices – Turn off your scanner. Turn off your computer. Wait 30 seconds. Turn on the computer first, wait for it to fully start. Then turn on the scanner.
- Check Power – Make sure your scanner is plugged in and powered on. Some scanners have a switch on the back. Check the power LED (little light).
- Disable WiFi temporarily – If it’s a wireless scanner, try connecting via USB first to test. If that works, the issue is WiFi-related.
- Restart Bluetooth service – Press Windows key + R. Type “services.msc” and press Enter. Find “Bluetooth Support Service.” Right-click and select “Restart.”
Problem 2: Windows Finds Scanner but Can’t Install Drivers
Symptoms: Windows discovers the scanner, but gets stuck on driver installation. You see “Installing drivers…” for over 5 minutes.
Solutions:
- Check Internet – Drivers download from the internet. Make sure your WiFi or ethernet is working. Download something else to confirm.
- Download drivers manually – Visit your scanner manufacturer’s website (Canon, HP, Brother, Xerox, etc.). Find your scanner model. Download the latest Windows 10/11 drivers. Run the driver file and follow instructions.
- Clear driver cache – Sometimes Windows gets confused. Disconnect the scanner. Search “Device Manager” in Start menu. Find your scanner under “Other devices” (might show as “Unknown”). Right-click and select “Delete device.” Restart computer and reconnect scanner.
- Check Windows Update – Sometimes drivers need Windows itself to be updated. Go to Settings → Update & Security → Check for updates. Install all updates. Restart.
Problem 3: Scanner Found But Won’t Scan
Symptoms: Your scanner shows in Settings, but scanning apps say “Cannot find scanner” or the scan fails.
Solutions:
- Try different app – If Windows Scan doesn’t work, try Windows Fax & Scan. Sometimes one app has issues while another works fine.
- Check scanner status – Look at your physical scanner. Are all lights on? Is it warm (good) or cold (might not be ready)? Some scanners take 30 seconds to warm up before they can scan.
- Restart scanner and app – Close the scanning app. Turn off the scanner. Wait 15 seconds. Turn it on. Wait 20 seconds. Open the app again.
- Check USB port again – Disconnect the scanner. Try a different USB port on your computer. Some ports on the back of computers are faster/more reliable than front ports.
- Look for error lights – Most scanners have indicator lights. A blinking light often means an error. Check the manual for what each light means. Common issues: paper jam, lid not closed, low toner/ink.
Problem 4: Wireless Scanner Keeps Disconnecting
Symptoms: Your WiFi scanner works for 10 minutes, then drops connection. You have to re-add it.
Solutions:
- Move closer to WiFi router – WiFi has range limits. If your scanner is 30 feet away through walls, signal gets weak. Try moving it closer (or moving the router).
- Check WiFi password – Wireless scanners sometimes forget their WiFi password, especially after a restart. Re-enter the password in the scanner’s menu.
- Restart your WiFi router – Unplug your WiFi router for 30 seconds. Plug it back in. Wait 2 minutes for it to fully restart. Then restart the scanner.
- Change WiFi channel – If you share WiFi with many neighbors (apartment building), there might be interference. Log into your router’s settings (usually 192.168.1.1 or 192.168.0.1). Change the WiFi channel from auto to channel 1, 6, or 11 (these don’t overlap).
- Check if scanner needs firmware update – Visit manufacturer’s website. Download the latest firmware for your scanner model. Follow their instructions to install it on the scanner.
Problem 5: Scanner Works But Scans Are Low Quality
Symptoms: Scanned documents look blurry, very dark, or very light. Colors are wrong.
Solutions:
- Clean the scanner glass – Use a soft, lint-free cloth. Dampen it very slightly with water. Gently wipe the glass inside the scanner where documents sit. Dry with another cloth. Dust or fingerprints cause blurry scans.
- Check scan resolution – In your scanning app, look for settings. Select a higher resolution (300 DPI is standard for documents, 600+ DPI for photos). Higher resolution = better quality but larger file size.
- Adjust brightness and contrast – Many scanning apps let you adjust these. If your scans are too light, increase brightness. If too dark, decrease brightness. Play with settings before scanning.
- Use correct color mode – For black & white documents, select “Black & White” mode (faster, smaller files). For photos, select “Color” mode. This setting is usually in scanning app.
- Check lamp/light in scanner – Some scanners have a lamp inside. If it’s dim or off, scans will be dark. This usually means the scanner is broken and needs repair.
FAQ: Common Questions About Scanner Setup
Q1: Do I Need Internet to Connect a Scanner?
A: For USB scanners, not really. You can plug in and use it offline. However, having internet helps because Windows automatically downloads drivers, which is much easier. For wireless scanners, yes, you need WiFi. For network scanners, yes, you need internet.
Best practice: Have internet available during initial setup. It makes everything faster and easier.
Q2: Can I Connect One Scanner to Multiple Computers?
A: Yes, definitely.
- USB scanners: Plug into one computer at a time (you’d have to physically move the cable).
- Wireless scanners: Connected to WiFi, so every computer on that WiFi can use it.
- Network scanners: Designed for multiple users; everyone on the network can scan.
Wireless is best if you want multiple people to scan at the same time.
Q3: Why Does My Scanner Take So Long to Install?
A: Drivers can take a while for three reasons:
- Slow internet – Windows needs to download driver files from Microsoft servers. On slow WiFi, this can take 2-3 minutes.
- First-time setup – The very first time you connect a new scanner model, Windows needs to do more work.
- Manufacturer website lookups – Windows checks if the manufacturer has updates. This adds a minute or two.
Reality: Most scanners install in 1-2 minutes. If it takes more than 5 minutes, something might be wrong.
Q4: Which Windows Version Should I Use: Windows 10 or Windows 11?
A: For scanners, both work identically. The setup steps are the same. Windows 11 is slightly faster at finding scanners, but Windows 10 works perfectly fine. If you already have Windows 10, don’t upgrade just for scanners.
Q5: Are There Scanners That Don’t Need Drivers?
A: Yes, some newer scanners use standard protocols that Windows recognizes immediately. These are called “WIA” scanners (Windows Image Acquisition). You can use them without downloading drivers from the manufacturer.
However, installing the manufacturer’s driver usually adds extra features and capabilities, so it’s still recommended.
Q6: Can I Use My Phone as a Scanner?
A: Absolutely! Most modern phones have excellent cameras. Apps like Adobe Scan, Microsoft Office Lens, or Google PhotoScan can turn phone photos into scanned documents automatically.
However, these phone apps don’t connect to your computer as “scanners.” They’re separate tools. If you specifically need a hardware scanner connected to Windows, you still need a physical scanner device.
Q7: What’s the Difference Between a Scanner and a Multifunction Printer?
A: Multifunction printers do both printing and scanning (plus sometimes copying and faxing). They connect the same way as scanners. If you have a multifunction printer, you already have a scanner built in.
For Windows, multifunction devices appear as both a printer and a scanner in Settings.
Q8: Do I Need to Uninstall Drivers When I Remove a Scanner?
A: No, you don’t need to. Leaving old drivers installed doesn’t hurt anything. They take up minimal space and don’t cause problems. However, if you want to completely clean up your system, you can uninstall them through Settings → Apps & features → search for your scanner → Uninstall.
Q9: Can I Connect a Scanner Made in 2010 to Windows 11?
A: Sometimes, but not always. Very old scanners might not have Windows 11 drivers. The manufacturer might not have created drivers for modern Windows.
What to do:
- Visit the manufacturer’s website
- Search for your old scanner model
- Check if Windows 11 drivers exist
- If yes, download and install them
- If no, the scanner probably won’t work on Windows 11
Many older scanners still work fine. It depends on the specific model.
Q10: Should I Keep My Scanner Plugged In All the Time?
A: USB scanners don’t need to stay plugged in when not using them. You can unplug them, store them, and plug back in when needed.
Wireless scanners should stay plugged in if you want to use them frequently. They need constant power to maintain WiFi connection.
Network scanners are always plugged in—that’s standard for office equipment.
Advanced Tips for Power Users
Tip 1: Improve Your Laptop’s Speed (Related Topic)
Scanners and other devices slow down your computer when many are connected. If you’re struggling with slow laptop performance after adding devices, check out our detailed guide to improving laptop speed and boot time. Many users see significant speed improvements by following those tips.
Tip 2: Create a Scan Shortcut
You can create a shortcut that opens your scanner app and immediately starts a scan with default settings. This saves clicks every time you need to scan something.
Right-click on your desktop → New → Shortcut → Enter the app path → Name it → Right-click shortcut → Properties → Shortcut tab → Advanced → Check “Run as administrator.”
Tip 3: Organize Scanned Files
Create a folder structure for your scans. Something like:
Scans\
  ├─ 2026\
  │   ├─ Personal\
  │   ├─ Business\
  │   └─ Receipts\
  └─ Archive\
Use Windows Search to find scanned documents later. Saves hours when you need that one receipt from March.
Tip 4: Use OCR to Make Scans Searchable
OCR (Optical Character Recognition) turns scanned images into actual text that Windows can search. Microsoft Office has built-in OCR. Many scanner apps offer it too. This means you can search for specific text inside your scanned documents.
Tip 5: Backup Your Scanned Documents
Don’t store all your scans only on your computer. Set up cloud backup using OneDrive, Google Drive, or similar service. If your computer breaks, your scanned documents are safe in the cloud.
Comparison Table: Which Scanner Type Should You Buy?
| Your Situation | Best Scanner Type | Why? | Budget |
|---|---|---|---|
| Work from home alone | USB scanner | Simple setup, fast, no WiFi issues | $150-$300 |
| Small office (2-5 people) | Wireless scanner | Everyone can use, no cables | $300-$600 |
| Large office (20+ people) | Network scanner | Shared, powerful, managed by IT | $2,000+ |
| Student taking notes | Portable USB scanner | Lightweight, travels with laptop | $200-$400 |
| Need to scan frequently | Multifunction printer | Print + scan in one device | $400-$800 |
| Limited desk space | Portable scanner | Compact, stores easily | $250-$400 |
External Resources & References
For additional help and official information:
- Microsoft Official Scanner Support Guide – Comprehensive Windows support from Microsoft directly
- PC World: Scanner Setup Guide 2024-2026 – Detailed reviews and setup instructions for popular scanner models
- CNET Scanner Reviews & Troubleshooting – Expert testing and real-world scanner recommendations
Key Takeaways
Setting up a scanner in 2026 is genuinely easy. Windows has become much better at automatically finding and installing scanner drivers. In most cases, you plug in (or connect to WiFi) and wait 2-3 minutes. No complicated steps or hunting for CDs.
USB is simplest, wireless is most flexible. Choose based on your situation. Home office? USB is perfect. Small team? Wireless is better. Large office? Network scanner is the standard.
Built-in Windows apps work great. You don’t need fancy third-party software for basic scanning. Windows Scan is beautiful and fast for simple jobs. Windows Fax and Scan handles advanced needs.
Troubleshooting is usually simple. 90% of connection problems fix themselves with a restart or trying a different USB port. Only occasionally do you need to manually download drivers.
Keep your system running smoothly. If you’re adding scanners and other devices to an older computer, it might start feeling slow. Check out our guide to speeding up your laptop and Windows performance for tips that really work.
The bottom line: Don’t be intimidated by scanner setup. Follow these steps and your scanner will be working within minutes.
Conclusion: You’ve Got This
Connecting a scanner to your Windows 10 or Windows 11 computer in 2026 is one of the easiest tech setups you’ll do. The days of hunting for driver CDs and spending an hour on installation are gone.
Whether you choose a simple USB scanner, a flexible wireless model, or work with an office network scanner, the process is straightforward:
- Connect physically (USB) or to WiFi (wireless)
- Let Windows find it (usually happens automatically)
- Use it immediately (drivers install in background)
You now have all the information you need. The steps are clear. The troubleshooting solutions are practical. And you know exactly which scanner type fits your situation.
Your scanning is about to become much more convenient.