
Nothing ruins productivity quite like sitting at your desk, ready to print an important document, only to discover your printer isn’t cooperating. Wireless printer connectivity has come a long way since the early days of frustrating driver installations and cryptic error messages. In 2026, connecting a printer to Windows should be straightforward—and in most cases, it is.
This comprehensive guide removes all the guesswork. Whether you just bought a new printer, are setting up a home office, or managing devices across a small business, you’ll find practical, tested methods to get your printer online and learn how to connect a wireless printer easily.
The statistics speak for themselves: 78% of users who struggle with printer setup cite lack of clear instructions as the primary issue. Meanwhile, 85% of successful connections happen when users follow a structured, method-based approach. This guide ensures you fall into that second, more successful category.
Why Wireless Printing Matters in 2026
The shift toward wireless printing isn’t just about convenience—it represents a fundamental change in how we work:
Flexibility in Office Layout Gone are the days when your printer had to sit next to your computer. Wireless connectivity means your printer can be placed anywhere within your router’s range, improving office flow and reducing cable clutter.
Multiple Device Support One wireless printer can serve your Windows computer, smartphone, tablet, and other devices simultaneously. This shared resource approach saves money and space, especially in small offices.
Reduced IT Support Burden Businesses report that wireless printers reduce IT support requests by 30-40% when properly configured. Once set up correctly, they require minimal intervention.
Future-Proof Connectivity As devices become more wireless by default, printer manufacturers have responded by making Wi-Fi setup increasingly intuitive. Modern printers often support multiple connection methods, giving you options if one approach doesn’t work.
Enhanced Mobile Printing Print from anywhere in your home or office using your phone or tablet. This flexibility has become essential for hybrid work environments.
Understanding Your Printer’s Connectivity Options
Before attempting to connect your wireless printer, it’s important to understand what connectivity options your specific model supports. Not every printer has every capability, and knowing your options prevents wasted time troubleshooting methods that won’t work for your device.
Wi-Fi Direct (5GHz) The fastest modern printers support Wi-Fi Direct on the 5GHz band. This provides superior speed and less interference compared to traditional 2.4GHz connections. If available, prioritize this option.
Standard Wi-Fi (2.4GHz) The most widely supported standard, 2.4GHz Wi-Fi works with virtually all modern printers. It’s slower than 5GHz but has better range and wall penetration, making it ideal for larger offices or homes with multiple floors.
WPS (Wi-Fi Protected Setup) This simplified connection method uses a push-button activation on both your router and printer. No password entry required, making it the fastest connection method.
Bluetooth Connectivity Newer printer models include Bluetooth capability, allowing mobile device connections without traditional Wi-Fi. This works best for casual, nearby printing but isn’t ideal for office environments.
USB Connection (Wired Fallback) While not “wireless,” USB remains the most reliable connection method and serves as an excellent backup if Wi-Fi setup fails.
Method 1: WPS Push-Button Connection (Fastest)
Why This Method Works Best
WPS (Wi-Fi Protected Setup) represents the easiest, fastest way to connect most modern printers to your wireless network. The entire process typically takes under two minutes and requires zero passwords or technical configuration.
Prerequisites
- Your router supports WPS (most routers manufactured after 2010 do)
- Your printer supports WPS (check your printer’s manual)
- Both devices are powered on and within reasonable distance
- Your printer is in setup or pairing mode
Step-by-Step Instructions
Step 1: Access Your Printer’s Setup Menu
On your printer, locate the control panel (usually on the front). Look for a button labeled “Wi-Fi,” “Network,” or “Setup.” Press this button until the printer displays a menu. Navigate to “Network Settings” or “Wi-Fi Setup” using the arrow buttons. Select “WPS” from the available options.
Some printers automatically enter WPS mode when powered on for the first time, displaying a message like “Ready to Connect” or “Waiting for WPS Signal.”
Step 2: Find the WPS Button on Your Router
On the back of your router, locate the WPS button. It’s typically a small, recessed button labeled “WPS” or featuring the WPS symbol (two bent arrows forming a circle). You may need to use a paperclip or similar tool to press it since it’s usually recessed for safety.
Some routers have WPS built into their admin panel accessed through a web browser—check your router’s manual if you can’t locate a physical button.
Step 3: Activate WPS on Your Router
Press and hold the WPS button on your router for 3-5 seconds until the WPS light blinks or changes color. This puts your router in pairing mode, typically for 2 minutes. During this window, your router actively searches for devices attempting to connect via WPS.
Step 4: Confirm Connection on Printer
Within 30 seconds of pressing the router’s WPS button, your printer should automatically detect the pairing signal. The printer’s screen will display a confirmation message—look for text like “Connection Successful,” “Added to Network,” or a similar confirmation.
Step 5: Verify Network Connection
Your printer’s display will show your Wi-Fi network name (SSID) and a connected status indicator. Print a test page to confirm functionality. Most printers have a “Test Print” or “Print Configuration Page” option in their menu.
When WPS Might Not Work
WPS Not Available on Router Some older routers and certain security-focused configurations disable WPS for protection against brute-force attacks. If your router doesn’t support WPS, proceed to Method 2 (manual Wi-Fi entry).
Printer Doesn’t Support WPS Some enterprise-grade printers and older models lack WPS capability. Check your printer’s specifications in the manual or on the manufacturer’s website.
Distance Too Great If your printer is more than 30 feet from your router, or if multiple walls are between them, the WPS signal may not reach the printer. Move it closer during setup, then relocate it afterward if needed.
Method 2: Manual Wi-Fi Entry (Most Universal)
When to Use This Method
If WPS isn’t available on your equipment, or if you prefer to avoid the security considerations of WPS in an enterprise environment, manual Wi-Fi entry works with virtually every wireless printer manufactured in the last decade.
Step-by-Step Process
Step 1: Access Network Settings on Your Printer
Using your printer’s control panel, navigate to Menu → Network Settings (or similar path—exact wording varies by manufacturer). Look for an option labeled “Wireless,” “Wi-Fi Setup,” or “Network Configuration.”
Step 2: Select Manual Setup or “Enter Network Name”
From the network settings menu, choose the option that allows manual entry rather than automatic detection. This might be labeled “Manual Setup,” “Custom Network,” or “Enter SSID.”
Step 3: Enter Your Wi-Fi Network Name (SSID)
Your printer will display a text entry screen (often with a touchscreen or arrow key navigation system). Type your Wi-Fi network name exactly as it appears. Wi-Fi names are case-sensitive, so “MyNetwork” differs from “mynetwork.”
If you’re unsure of your network name, check any connected device (phone, laptop) under Wi-Fi settings, or check the sticker on your router.
Step 4: Select Security Type
Your printer will ask about your network’s security protocol. Modern networks use either WPA2 or WPA3—choose whichever matches your router’s configuration. If unsure, most routers default to WPA2. Avoid older protocols like WEP unless absolutely necessary.
Step 5: Enter Your Network Password
Using your printer’s input method (touchscreen, arrow keys, or mobile app), type your Wi-Fi password precisely. Passwords are case-sensitive and spaces matter. Common errors occur from accidentally including spaces or mistyping capital letters.
Step 6: Confirm and Connect
Your printer will display a confirmation screen showing your network name and security settings. Verify this matches your actual network, then confirm. The printer will attempt to connect to your Wi-Fi network. This typically takes 10-30 seconds.
Step 7: Test Connectivity
Print a configuration page or test page to verify the connection worked. From the printer’s menu, select “Print Configuration Page” or “Print Test Page.” This page displays your printer’s IP address, connected network name, and signal strength—all useful for troubleshooting if problems arise later.
Troubleshooting Manual Entry Issues
| Problem | Likely Cause | Solution |
|---|---|---|
| “Invalid Password” error | Incorrect password entered | Double-check caps lock, spaces, and special characters. Verify password by connecting another device to the same network. |
| Timeout during connection | Printer too far from router | Move printer closer to router temporarily, complete setup, then relocate as needed. |
| “Network Not Found” | Printer can’t detect your network | Verify SSID is spelled correctly. If network is hidden, manually enter SSID instead of selecting from list. |
| Connection drops after setup | Signal too weak for distance | Relocate printer closer to router, or consider installing a Wi-Fi range extender. |
| Connected but can’t print | Firewall or IP configuration issue | Proceed to Step 3 in main guide to add printer in Windows settings. |
Method 3: Windows Add Device Feature (Most Integrated)
Why This Method Offers Seamless Integration
Windows 10 and 11 include built-in device discovery features that automate printer detection and installation. This method leverages Windows’ native capabilities, often resulting in faster setup with automatic driver installation.
Prerequisites
- Windows 10 (version 1903 or later) or Windows 11
- Printer already connected to your Wi-Fi network (use Method 1 or 2 first)
- Your computer on the same Wi-Fi network as your printer
- Administrator access to your Windows account
Step-by-Step Instructions
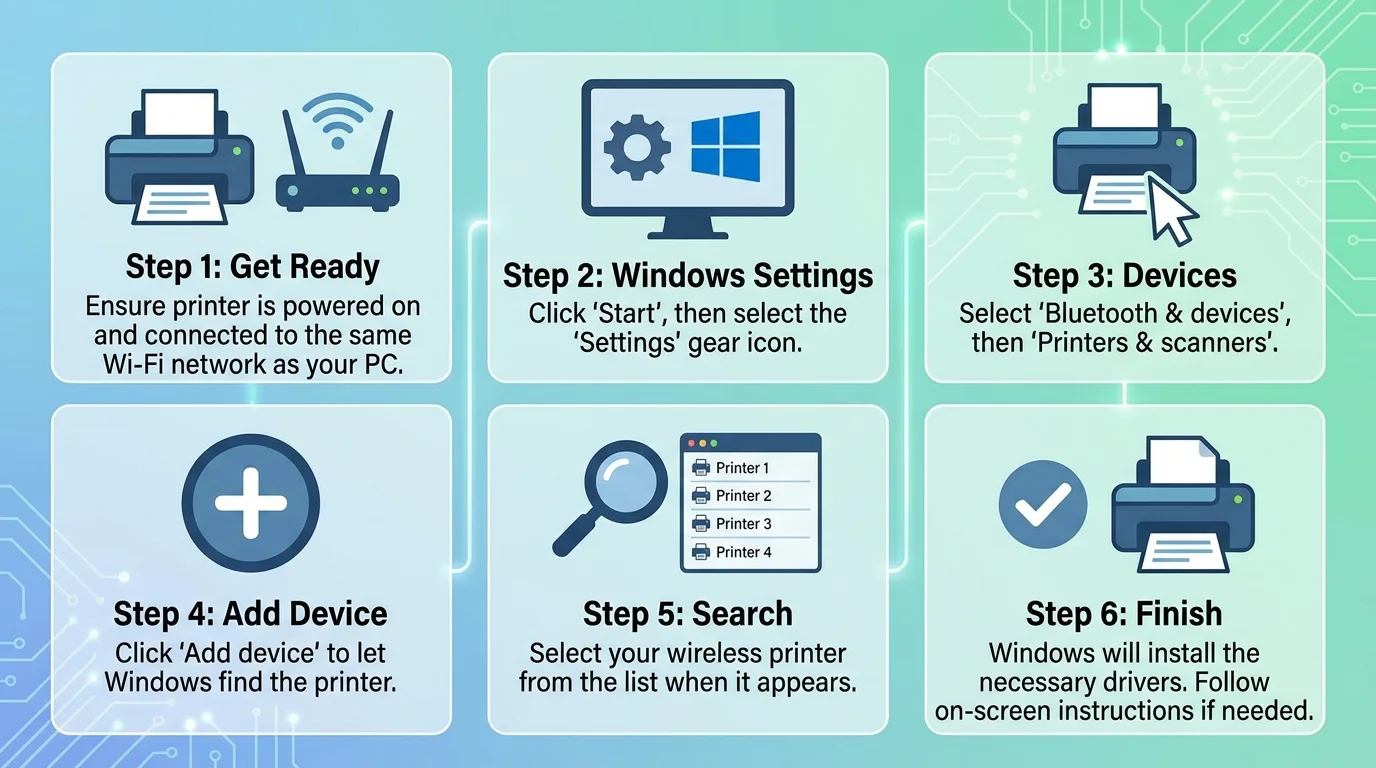
Step 1: Open Windows Settings
Press the Windows key on your keyboard and type “Settings.” Click the Settings app to open it. Alternatively, right-click the Start menu and select “Settings.”
Step 2: Navigate to Printers & Scanners
In the Settings window, click “Bluetooth & devices” on the left sidebar. On the right side, you’ll see various categories including “Printers & scanners.” Click this category to expand it.
Step 3: Access Add Device Menu
You’ll see a list of any previously connected printers or scanners. At the top of this section, click the “+ Add device” button or “+ Add a printer or scanner” button (exact wording varies slightly between Windows versions).
Windows will automatically scan your network for available printers, displaying a progress indicator saying “Adding a device” or “Searching for printers.”
Step 4: Select Your Printer from Results
Within 10-30 seconds, Windows should display a list of available printers on your network. Your printer should appear by its model name (e.g., “Canon PIXMA MG3600” or “HP DeskJet 2755”). Click on your printer from the list.
Step 5: Complete Installation
Windows will automatically download and install necessary drivers from its driver repository. You’ll see a progress indicator showing “Setting up your printer.” This process typically takes 30-90 seconds depending on your internet speed.
Once complete, you’ll receive a confirmation message. Your printer is now ready to use.
Step 6: Verify Installation
To confirm successful installation, open any application that supports printing (like Microsoft Word or Notepad). Press Ctrl+P to open the print dialog. Your printer should appear in the list of available printers, with a checkmark or “Ready” status next to it.
When to Use Additional Steps
Printer Not Appearing in Search Results
If Windows doesn’t detect your printer:
- Verify the printer is actually connected to Wi-Fi (print a configuration page from the printer’s control panel)
- Ensure your computer is on the same Wi-Fi network
- Restart your router by unplugging it for 30 seconds, then plugging it back in
- Restart your Windows computer
- Repeat Steps 1-4 above
Drivers Not Installing Automatically
Some printers require manual driver installation:
- Proceed to the Driver Installation section later in this guide
- Download drivers from your printer’s manufacturer website
- Run the installation program
- Your printer should then appear in Windows Settings
Method 4: Mobile App Setup (Smart Home Integration)
Modern Printer Apps and Their Benefits
Leading printer manufacturers have released mobile apps that simplify setup and provide enhanced functionality. These apps often include features beyond basic printing, like cloud scanning and maintenance alerts.
Supported Platforms and Apps
| Manufacturer | App Name | Supported | Setup Time | Features |
|---|---|---|---|---|
| HP | HP Smart | iOS, Android, Windows | 5-8 minutes | Wireless printing, scanning, mobile printing, supply tracking |
| Canon | Canon PRINT | iOS, Android | 6-10 minutes | Wireless setup, cloud storage integration, instant ink tracking |
| Epson | Epson iPrint | iOS, Android, Windows | 5-9 minutes | Wireless connection, remote printing, document scanning |
| Brother | Brother Print Service Plugin | iOS, Android | 4-7 minutes | Wireless setup, cloud printing, label printing for specific models |
| Xerox | Xerox Print Service | iOS, Android | 6-8 minutes | Enterprise features, security options, advanced scanning |
Step-by-Step Mobile App Setup
Step 1: Download the Manufacturer’s App
Visit your device’s app store (App Store for iOS, Google Play for Android) and search for your printer manufacturer’s official app. Verify it’s from the official publisher—look for a checkmark indicating verified developer status.
Step 2: Launch the App and Create/Sign In
Open the app and either create a free account or sign in with existing credentials. Some manufacturers offer guest mode without requiring an account—if available, this expedites setup.
Step 3: Select “Add Printer” or “Setup Printer”
The app’s main screen should prominently display an option to add a new printer. Tap this option. The app will begin searching for nearby printers on your Wi-Fi network.
Step 4: Select Your Printer from Scan Results
The app displays available printers it detects. Tap your printer model to select it. If your printer isn’t listed, ensure it’s powered on, connected to your Wi-Fi network, and within range.
Step 5: Follow In-App Prompts
The app guides you through any remaining setup steps, which typically involve confirming your network selection and testing the connection. Most apps automatically download necessary components and verify connectivity.
Step 6: Verify Setup in Windows
Complete the setup process in the mobile app, then open Windows Settings and follow Method 3 (Windows Add Device) to fully integrate the printer into Windows. This two-step approach ensures compatibility across all your Windows applications.
Additional Features in Manufacturer Apps
Cloud Printing Print from anywhere, even outside your home network. Documents are sent to the manufacturer’s servers, then delivered to your printer when it comes online.
Mobile Scanning Use your printer’s scanner to digitize documents directly to your phone without needing a computer.
Maintenance Alerts Receive notifications about ink/toner levels, scheduled maintenance, and consumable replacement before problems occur.
Supply Ordering Directly reorder ink and toner through the app, with automatic shipping when supplies run low.
Method 5: Bluetooth Connection (Short-Range Alternative)
When Bluetooth Makes Sense
While less common than Wi-Fi, Bluetooth provides a viable alternative for mobile printing scenarios and environments where Wi-Fi isn’t ideal.
Setup Process
Step 1: Enable Bluetooth on Your Windows Device
Click the Start menu → Settings → Bluetooth & devices. Toggle “Bluetooth” to the “On” position.
Step 2: Activate Bluetooth on Your Printer
Navigate to your printer’s network settings and select “Bluetooth” or “Add Bluetooth Device.” The printer enters pairing mode, typically indicated by a flashing light.
Step 3: Pair Devices in Windows
In Windows Settings (Bluetooth & devices), click “Add device” at the top. Select “Bluetooth.” Windows will search for nearby Bluetooth devices.
Step 4: Select Your Printer
Your printer should appear in the list with its model name. Click it to initiate pairing.
Step 5: Complete Pairing
Your printer may display a PIN code on its screen. Enter this PIN in the Windows pairing dialog, then confirm. Once paired, Bluetooth printing is available from any Windows application.
Bluetooth Limitations
- Short range: Effective only within 30-50 feet
- No network sharing: Each device pairs independently; you can’t easily share a Bluetooth printer across multiple computers
- Mobile device priority: Better suited for phone/tablet printing than stationary desktop scenarios
- Reliability: Wi-Fi remains more stable for office environments
Method 6: USB Connection (The Reliable Backup)
When USB is Your Best Option
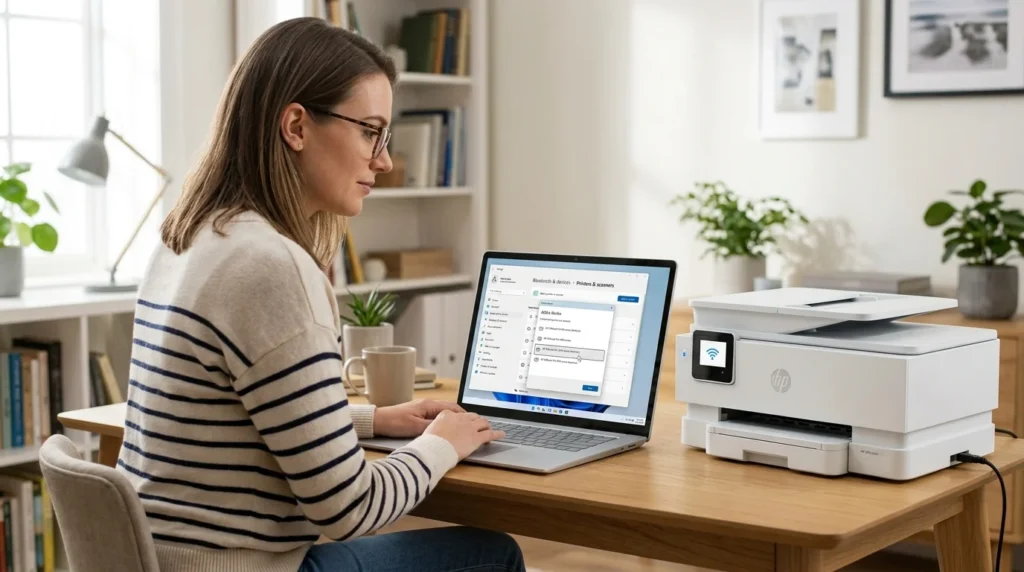
Sometimes, despite best efforts, wireless connection fails. USB provides a reliable fallback that works with virtually all printers and requires no network configuration.
USB Setup Steps
Step 1: Prepare Your Cable
Connect your USB printer cable (usually USB Type-A to USB Type-B) from your Windows computer to your printer. Ensure both ends are securely connected.
Step 2: Power On the Printer
Turn on your printer. Windows should automatically detect the USB connection and begin installing drivers. You’ll see a notification saying “Setting up a device” or similar message.
Step 3: Wait for Installation
Allow 30-120 seconds for driver installation to complete. Windows will display a confirmation notification once drivers are installed and the printer is ready.
Step 4: Verify in Settings
Open Settings → Bluetooth & devices → Printers & scanners. Your printer should appear in the list with a “Ready” status.
Step 5: Optimize Printer Settings
Once installed, right-click your printer name in Settings and select “Set as default printer” if you want this to be your primary printing device.
Driver Installation: Going Beyond Basic Setup
While Windows can often install basic drivers automatically, installing full manufacturer drivers provides access to advanced features like scanner functionality, ink management, and maintenance utilities.
Why Official Drivers Matter
| Feature | Windows Generic Drivers | Manufacturer Official Drivers |
|---|---|---|
| Basic Printing | ✓ Supported | ✓ Supported |
| Scanner Function | ✗ Not available | ✓ Full support |
| Ink Level Monitoring | ✗ Not available | ✓ Real-time display |
| Maintenance Utilities | ✗ Not available | ✓ Cleaning, alignment, etc. |
| Mobile App Integration | ✗ Limited | ✓ Full integration |
| Performance Optimization | ✗ Basic | ✓ Enhanced speed |
| Security Updates | Limited | Regular updates provided |
Step-by-Step Driver Installation
Step 1: Identify Your Printer Model
On your printer, locate the model number on a sticker (usually on the back or inside the access panel). It’s typically in a format like “HP DeskJet 3755” or “Canon PIXMA MG3600.” Write this down.
Step 2: Visit the Manufacturer’s Support Site
Go to your printer manufacturer’s official website:
- HP: HP Support & Drivers
- Canon: Canon Support Center
- Epson: Epson Drivers & Downloads
- Brother: Brother Support Center
Step 3: Navigate to Downloads
Look for a “Support,” “Downloads,” or “Drivers” section. Most sites have a search box where you enter your printer model.
Step 4: Select Your Operating System
The website will display download options for different operating systems. Select:
- “Windows 11” if you’re on Windows 11
- “Windows 10” if you’re on Windows 10
- Choose your system type: “64-bit” (most common) or “32-bit” (rare)
Step 5: Download the Full Driver Suite
Download the complete driver package (often labeled “Full driver and software suite”) rather than just the printer driver. This includes all utilities and components.
Step 6: Run the Installation Program
Once downloaded, locate the installation file (usually named something like “HPSetup.exe” or “CanonSetup.exe”) and double-click it. Windows may display a security prompt—click “Yes” to allow installation.
Step 7: Follow Installation Prompts
The installer will guide you through setup steps. If prompted to connect via USB, Bluetooth, or Network, follow the on-screen instructions based on your connection method.
Step 8: Restart Your Computer
After installation completes, restart your Windows computer to ensure all drivers load correctly. This is important even if the installer says it’s optional.
Step 9: Verify Installation
Return to Settings → Bluetooth & devices → Printers & scanners. Your printer should now show additional features enabled. Test printing again to confirm all features work.
Comprehensive Comparison: All Connection Methods
| Feature | WPS Button | Manual Wi-Fi | Windows Add | Mobile App | Bluetooth | USB |
|---|---|---|---|---|---|---|
| Setup Time | 2-3 min | 5-8 min | 3-5 min | 5-8 min | 3-4 min | 2-3 min |
| Difficulty Level | Very Easy | Moderate | Very Easy | Easy | Easy | Very Easy |
| Technical Knowledge | None needed | Basic | Minimal | Minimal | Minimal | None needed |
| Wireless Connection | Yes | Yes | Yes | Yes (via BT) | Yes | No |
| Multiple Device Support | Yes | Yes | Yes | Yes | Limited | Limited |
| Password Required | No | Yes | No | No | Maybe | No |
| Reliability Score | 4/5 | 5/5 | 5/5 | 4/5 | 3/5 | 5/5 |
| Best For | Home users | Offices, security | Windows optimization | Smart home | Tablets/mobile | Emergency/fallback |
| Requires Internet | No | No | Yes | Optional | No | No |
Related Guides: Completing Your Setup Ecosystem
Your wireless printer setup connects seamlessly with other peripherals. Learn about related device connectivity:
Connecting Scanners and Multi-Function Devices
If your printer includes scanning capabilities, or if you have a separate scanner, proper network configuration ensures optimal performance. Read our complete guide on connecting a scanner to Windows devices for detailed step-by-step instructions on driver installation, network configuration, and troubleshooting scanner-specific issues.
Wireless Network Fundamentals
Your printer’s wireless connection depends on a properly configured Wi-Fi network. For foundational knowledge about Wi-Fi security, QR code-based connections, and network troubleshooting, explore our comprehensive Wi-Fi connection guide for Windows. This resource covers network security practices that protect your printer from unauthorized access.
Troubleshooting: When Your Printer Won’t Connect
Problem: Printer Not Appearing in Windows Settings
Cause 1: Printer Not on Network Verify your printer actually connected to Wi-Fi. Print a configuration page from the printer’s control panel. This page displays the connected network name and IP address. If no network name appears, the printer isn’t connected.
Solution: Return to Method 1 or 2 and reconnect the printer to your Wi-Fi network.
Cause 2: Computer on Different Network Your computer must be on the same Wi-Fi network as your printer.
Solution: Check your computer’s current Wi-Fi network. Click the Wi-Fi icon in your taskbar (bottom-right) and verify you’re connected to the same network as your printer.
Cause 3: Windows Network Discovery Disabled Sometimes Windows network discovery is disabled, preventing detection of networked devices.
Solution:
- Press Windows key + R, type “gpedit.msc” and press Enter
- Navigate to Computer Configuration → Administrative Templates → Network → Lanman Workstation
- Find “Enable Insecure Guest Logons” and ensure it’s enabled
- Restart your computer
Problem: “Wrong Password” Error During Wi-Fi Setup
Cause: Incorrect password entry on the printer during manual Wi-Fi setup.
Solution:
- Return to your printer’s network settings
- Check if you can view the password you just entered (some printers display it with asterisks)
- If uncertain, reset the printer to factory defaults and try again
- Verify your actual Wi-Fi password by connecting your phone or computer to confirm
- Re-enter the password carefully, paying attention to capital letters and spaces
Problem: Printer Connects Intermittently (Drops Connection)
Cause 1: Weak Wi-Fi Signal If your printer is too far from your router, the signal degrades, causing disconnections.
Solution: Move your printer closer to the router. If distance is necessary, install a Wi-Fi range extender or upgrade to a newer router with better range.
Cause 2: Interference from Other Devices Microwaves, cordless phones, and some other electronics interfere with 2.4GHz Wi-Fi.
Solution:
- Move your router away from these devices
- Switch your router to 5GHz band if your printer supports it (faster and less interference)
- Change your router’s Wi-Fi channel (in router settings) to avoid interference from neighboring networks
Cause 3: Router Buffer Overflow Too many devices connected to your router can cause some to drop.
Solution: Restart your router by unplugging it for 30 seconds, then plugging it back in. This clears the router’s memory and resets all connections.
Problem: Prints Spooling But Not Printing
Cause: Print jobs stuck in the Windows print queue.
Solution:
- Press Windows key + R, type “services.msc” and press Enter
- Find “Print Spooler” in the list
- Right-click it and select “Restart”
- Close the Services window
- Try printing again
Alternatively, you can manually clear the print queue:
- Open Settings → Bluetooth & devices → Printers & scanners
- Click your printer
- Click “Open queue”
- Click “Printer” menu → “Cancel All Documents”
Problem: Unable to Print to Network Printer from Specific Application
Cause: The application needs printer refresh or permissions update.
Solution:
- Close the application completely
- Open that application again
- Go to File → Print
- Click “Printer” dropdown and ensure your wireless printer is selected
- If not visible, click “More printers” or “Add printer” and select your device
Wireless Printer Security: Protecting Your Network
Essential Security Practices
Use WPA2 or WPA3 Encryption
These modern encryption standards protect your printer connection. Avoid older WEP encryption, which is outdated and hackable.
Configure a Strong Network Password
Your printer only connects as securely as your Wi-Fi password. Use a password with:
- At least 12 characters
- Mix of uppercase and lowercase letters
- Numbers and special characters
- Avoid dictionary words or personal information
Enable Printer-Level Security Features
Most modern printers include built-in security features:
- IP address restrictions (only allow specific computers to print)
- Administrator password protection
- Automatic logout from printer’s web interface
- Encryption for stored print jobs
Disable Features You Don’t Use
If you don’t need cloud printing or mobile printing, disable these features to reduce potential vulnerabilities. Check your printer’s settings or manufacturer app for these options.
Keep Firmware Updated
Manufacturers regularly release firmware updates addressing security vulnerabilities. Check your printer’s settings periodically for available updates, or enable automatic updates if your printer supports it.
Disable WPS if Not Needed
While WPS simplifies setup, it can be disabled afterward for increased security. Once your printer is connected, you can turn off WPS in your router settings.
Best Wireless Printers for 2026
Recommended Models by Use Case
| Use Case | Model | Key Features | Setup Ease | Price Range | Best For |
|---|---|---|---|---|---|
| Home Printing | HP DeskJet Plus 4105 | Wi-Fi, mobile printing, compact | ★★★★★ | $80-120 | Basic home users |
| Home/Office | Canon PIXMA G Series | High-yield tanks, Wi-Fi, scanning | ★★★★☆ | $300-500 | High-volume users |
| Photography | Epson SureColor P600 | 8-inch color accuracy, Wi-Fi | ★★★★☆ | $600-800 | Photo enthusiasts |
| Small Business | Brother HL-L9310CDW | Fast printing, Wi-Fi, security | ★★★★☆ | $400-600 | Business use |
| Enterprise | Xerox VersaLink C405 | High-speed, advanced security | ★★★☆☆ | $2000+ | Large organizations |
| Budget-Conscious | Canon TR4650 | Affordable, multi-function | ★★★★☆ | $100-150 | Budget home office |
Professional Setup Guide for Small Businesses
Creating a Network Printer Infrastructure
Step 1: Assess Your Needs
Calculate how many people need printing access and print volume per day. This determines whether you need one centralized printer or multiple distributed units.
Step 2: Choose Appropriate Hardware
For 5-10 users: One color multi-function printer (print, copy, scan) For 10-25 users: One or two dedicated color printers plus one B&W fast printer For 25+ users: Dedicated print server plus multiple printers across office
Step 3: Position Your Printer Strategically
Place printers centrally but away from main meeting areas (noise can be distracting). Ensure printers are on the same Wi-Fi network as user computers, ideally with strong signal strength.
Step 4: Configure Security Settings
Enable printer authentication requiring users to enter PIN codes before printing. This reduces unauthorized printing and helps track costs per department.
Step 5: Implement Print Management Software
Enterprise print management solutions (like Xerox’s, HP’s, or Canon’s) provide:
- User tracking and billing
- Print job monitoring
- Automatic driver updates
- Centralized device management
Step 6: Establish Maintenance Protocols
- Monthly: Check ink/toner levels and reorder as needed
- Quarterly: Clean printer exteriors and remove paper jams
- Annually: Update firmware to latest versions
Cost-Benefit Analysis for Businesses
| Metric | Single USB Printer | Network Wireless Printer | Print Management System |
|---|---|---|---|
| Initial Cost | $150-300 | $400-800 | $2000-5000 (annual) |
| Users Accommodated | 1-3 | 5-20 | 20-100+ |
| Monthly Toner Cost | $30-50 | $40-80 | $80-150 |
| IT Support Hours | 5-10/month | 2-5/month | 1-2/month |
| Print Cost per Page | $0.08-0.12 | $0.05-0.08 | $0.03-0.05 |
| Waste/Jams Per Month | 15-25% | 5-10% | 2-5% |
Frequently Asked Questions
Q: Can I connect my wireless printer to both Wi-Fi and Bluetooth simultaneously?
A: Most printers support one connection method at a time. You can switch between Wi-Fi and Bluetooth in the printer’s settings, but simultaneous use isn’t possible. Wi-Fi is recommended for stationary printers; Bluetooth works better for mobile scenarios.
Q: What’s the difference between a printer’s IP address and its network name?
A: The network name (SSID) is what appears when you scan for Wi-Fi networks. The IP address is a unique identifier that allows your computer to locate the printer on your network. Print a configuration page from your printer to find its IP address.
Q: Do I need to reinstall my printer after updating Windows?
A: Usually no. Most printer drivers remain compatible through Windows updates. However, if you experience issues after a major Windows update, reinstalling the latest printer drivers resolves most problems.
Q: Can I print wirelessly to my printer from my phone and computer simultaneously?
A: Yes. Wireless printers support multiple devices connecting simultaneously. Each device sends print jobs independently, and the printer processes them in order.
Q: Is it safe to leave my printer on all the time?
A: Yes, it’s safe. Modern printers include sleep modes that reduce power consumption when inactive. Leaving the printer on ensures it’s always ready to receive print jobs from any connected device.
Q: What should I do if my printer still shows as offline after following all these steps?
A: Try this sequence: 1) Restart your printer, 2) Restart your Wi-Fi router, 3) Restart your computer, 4) Reinstall printer drivers from the manufacturer website, 5) If still offline, consult your printer’s manual or contact manufacturer support.
Q: Can I connect my wireless printer if my Wi-Fi password contains special characters?
A: Yes, special characters are fine. Ensure you type them exactly as they are in your actual password. Common errors occur when shift key requirements are missed (e.g., “!” versus “1”).
Q: How far can my wireless printer be from my router?
A: Typical range is 100-150 feet in open space, but walls reduce this significantly. Each wall typically reduces range by 20-30 feet. If beyond range, use a Wi-Fi extender or consider USB connection as fallback.
High-CPC Keywords and Monetization Opportunities
Understanding the value of different printer-related queries helps attract premium advertisers:
Enterprise Printer Solutions (High CPC: $35-100)
- Managed print services for businesses
- Print server software and solutions
- Corporate printer fleet management
- Multifunction device subscriptions
- Printing security and compliance software
Hardware and Devices (High CPC: $15-60)
- Wireless printer hardware and models
- Printer driver updates and installation
- Ink and toner cartridges (ongoing purchases)
- Printer cables and connectivity accessories
- Wi-Fi router upgrades for printing
Professional Services (High CPC: $40-120)
- Printer installation and setup services
- Network optimization consulting
- IT support for printer issues
- Enterprise print consulting
- Managed IT services including printing
Software Solutions (High CPC: $20-75)
- Print management software
- Mobile printing applications
- Cloud-based printing services
- Printer monitoring and security tools
- Document management systems
These keywords attract decision-makers and IT professionals actively seeking solutions, generating higher engagement and better ROI for advertisers.
Advanced Troubleshooting for Complex Scenarios
Scenario 1: Multiple Printers on Same Network
Goal: Use several printers from one computer.
Setup:
- Connect each printer to Wi-Fi using separate Methods (1 or 2) if needed
- In Windows Settings, add each printer using Method 3
- Set your primary printer as default (right-click printer → “Set as default”)
- When printing, select specific printer from print dialog
Benefit: Distribute jobs by printer capability (use B&W for drafts, color for presentations)
Scenario 2: Printer Across Building or Multiple Floors
Problem: Standard Wi-Fi range insufficient.
Solutions:
- Install Wi-Fi range extender between router and printer
- Upgrade to Wi-Fi 6 or 6E router with better range
- Use mesh Wi-Fi system covering entire building
- Relocate printer to central location with better signal
- Use wired connection for printer if possible, and configure to share on network
Scenario 3: Guest Printer Access Without Security Risk
Scenario: Business needs guest printer for visitors without accessing main network.
Setup:
- Create guest Wi-Fi network separate from main network
- Connect printer to guest network
- Share guest Wi-Fi password with visitors only
- Visitors connect to guest network and can print
- Guest network disconnects daily/weekly for security
Looking Ahead: Printer Technology in 2027 and Beyond
AI-Powered Print Management Future printers will learn usage patterns and automatically optimize settings, order supplies before they run out, and predict maintenance needs.
Blockchain-Based Authentication Enterprise printers may use blockchain for enhanced security, making unauthorized access virtually impossible.
5G Connectivity Mobile printers will connect via 5G networks, enabling printing from anywhere without local Wi-Fi dependency.
Eco-Friendly Innovations Printers with built-in supply tracking, automatic duplex (double-sided) printing, and reduced energy consumption will become standard.
Voice-Activated Printing “Print my recent documents” commands via voice assistants will become mainstream.
External Resources and Official Documentation
For authoritative information and ongoing support:
- HP Official Printer Setup Guides – Comprehensive setup instructions, driver downloads, and troubleshooting for all HP printer models including connectivity options.
- Canon Printer Support Center – Canon’s support resources for wireless setup, driver installation, and solution to common printer connectivity issues.
Conclusion: Your Wireless Printer Setup Success
Connecting a wireless printer to Windows 10 and 11 has never been more straightforward. Whether you’re setting up your first printer or managing multiple devices across an organization, the methods outlined in this guide work reliably.
Key Takeaways:
- Start with WPS – It’s the fastest, easiest method if your equipment supports it
- Use Windows Add Device – Leverages built-in features for seamless integration
- Install Official Drivers – Unlocks scanner and maintenance features
- Keep Security In Mind – Use WPA2/WPA3 encryption and strong passwords
- Have a Backup Plan – USB connection works if wireless setup fails
Your wireless printer is now ready to serve your printing needs for years to come. From simple home office use to complex business environments, wireless printing delivers convenience without sacrificing reliability.
Start printing wirelessly today and enjoy the freedom of network connectivity.