
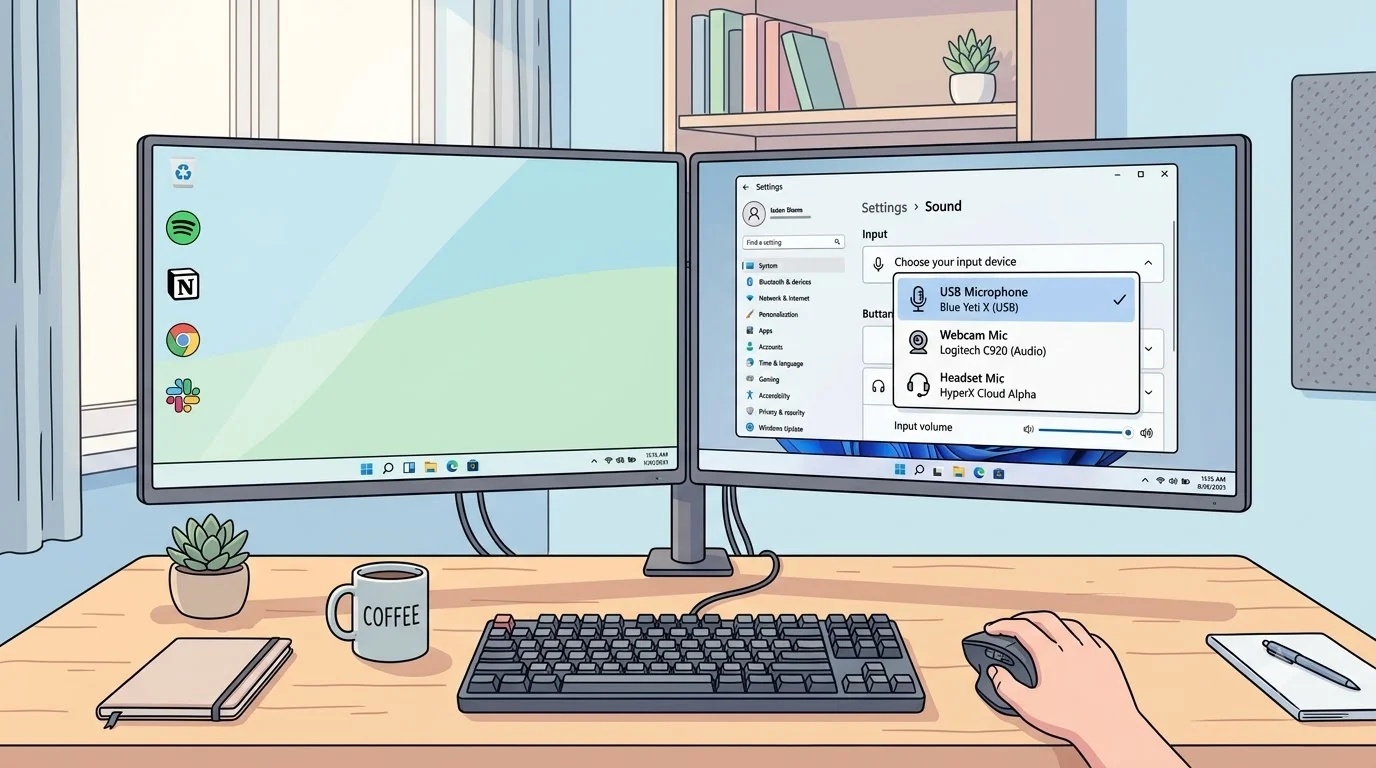
It happens to everyone at least once: you’re on an important video call, and the other person says “We can’t hear you.” You check everything—Zoom is running, your volume is up, but nothing works. Then finally, you discover the problem: your microphone is set to some device you plugged in three weeks ago and forgot about.
Or worse—you’re recording a YouTube video, excited about finally starting your channel, but the audio is completely muffled. After twenty minutes of troubleshooting, you realize Windows was routing audio through your laptop’s built-in microphone instead of the professional USB microphone sitting right in front of you.
These scenarios happen thousands of times every day to Windows users worldwide. The problem isn’t your hardware, your internet connection, or even your software. The problem is that you haven’t properly managed your audio input devices—and Windows won’t do it for you automatically.
Managing audio input devices means taking control of which microphone, headset, or recording device Windows uses for different apps and situations. When you master this skill, video calls sound crystal clear, your recordings are professional-quality, and you never again have to pause a meeting to hunt for mic settings.
This comprehensive guide will show you exactly how to do it, no matter your skill level.
What Does “Managing Audio Input Devices” Actually Mean? (Simple Breakdown)
An audio input device is anything that captures sound and sends it to your computer. Your computer then routes that audio to apps and services that need it.
Common audio input devices include:
- Built-in microphone in your laptop or monitor
- Headset microphone (wired or wireless)
- USB microphone for podcasting or streaming
- Condenser microphone with an audio interface
- Bluetooth headset for calls
- Gaming headset with attached mic
- XLR microphone (professional, needs interface)
- Line-in connection for external audio sources
- Smartphone headset via USB connection
- Conference room microphone array
Managing these devices means you:
- Know which device is currently active
- Can quickly switch between devices
- Assign different devices to different apps
- Adjust volume levels and sound quality
- Troubleshoot when something goes wrong
- Optimize settings for your specific use case
Think of it like having multiple doors to your house. Managing input devices is about choosing which door people use, keeping doors in good condition, and making sure the right door is open when you need it.
Why Managing Your Audio Input Device Matters (Real Impact on Your Life)
Professional Impact: Video Calls & Meetings
When you’re on a Zoom call with your manager or a client, your audio quality directly affects how professional you appear. Poor microphone quality makes people wonder if you’re serious about your job. Clear, consistent audio makes you sound competent and engaged.
When you properly manage your input devices:
- Your boss hears you clearly (not muffled or with background noise)
- You sound professional immediately (no “Can you hear me now?” moments)
- Your credibility increases (people judge professionalism by audio quality)
- You gain confidence in meetings (knowing your setup is solid)
Creative Impact: Podcasting & Content Creation
If you’re building a YouTube channel, podcast, or any audio-based content, your microphone quality is your most important technical investment. But even the best $300 USB microphone sounds terrible if Windows routes audio through your laptop’s built-in mic instead.
When you properly manage your input devices:
- Your recordings sound professional from day one
- You don’t waste time re-recording due to audio issues
- Listeners enjoy your content instead of cringing at audio quality
- You build authority faster (good audio = perceived professionalism)
Privacy Impact: Protecting Sensitive Conversations
Imagine you’re having a private conversation with a therapist, doctor, or lawyer over video call. The wrong microphone setting means your conversation could be picked up and routed somewhere unexpected. Proper input device management ensures confidential conversations stay confidential.
Productivity Impact: Less Troubleshooting, More Output
Every minute you spend troubleshooting audio is a minute you’re not productive. When your input devices are properly configured, you never think about them—they just work. That’s the goal.
Quick Reference: Which Microphone Device Is Right for Your Situation?
| Situation | Recommended Device | Reason | Cost | Setup Time |
|---|---|---|---|---|
| Daily video calls (Zoom, Teams, Google Meet) | Headset mic (wired or wireless) | Noise isolation, consistent positioning | $30-150 | 5 minutes |
| Casual messages and occasional calls | Built-in laptop mic | Convenient, no setup needed | $0 (included) | 0 minutes |
| Starting a YouTube channel | USB condenser microphone | Professional sound, easy setup, good value | $60-150 | 15 minutes |
| Serious podcasting or streaming | XLR mic + audio interface | Superior sound quality, expandable | $150-500+ | 1-2 hours |
| Gaming and Discord voice chat | Gaming headset | Integrated mic, built-in headphones, good clarity | $50-200 | 10 minutes |
| Professional recording studio | Multi-mic setup with mixer | Maximum control and options | $500-5000+ | Full day |
| Outdoor recording or interviews | Portable USB recorder | Portability, built-in mics, professional quality | $200-400 | 30 minutes |
| Voice assistant use (Alexa, Cortana) | Built-in mic or USB array mic | Hands-free operation, long-range pickup | $0-100 | 5 minutes |
| Phone interviews (remote jobs) | Bluetooth headset | Mobility, comfort, professional sound | $50-150 | 10 minutes |
| Music production and recording | Condenser mic + interface + preamp | Studio-quality captures for music | $200-800+ | 2-3 hours |
4 Methods to Manage Your Audio Input Devices (Choose Your Approach)
Method 1: The Instant Switch (Quick Settings – 10 Seconds)
This is your fastest option. Use this when you need to switch microphones right now—between your headset and laptop mic, for example.
Step-by-step:
- Click the speaker/volume icon in your system tray (bottom-right of taskbar, next to clock)
- Look for a small arrow or chevron next to the current microphone name. Click it to expand the device list.
- Review all connected input devices:
- Your active microphone has a dot or checkmark
- Connected headsets show with a headset icon
- USB devices show their brand name
- Bluetooth devices show with a Bluetooth icon
- Select a different microphone by clicking it
- Audio input immediately switches to the new device (test with a quick “Hello”)
Best for: Quick switching during calls, when you’re already in the middle of something
Time needed: 5-15 seconds
Advantage: Fastest possible method, no menus to navigate
Limitation: Doesn’t adjust advanced settings, changes don’t persist across restarts for some devices
Method 2: Persistent Default (Windows Settings App – Recommended)
Use this method to set a microphone as your permanent default for all apps. This is what most people should use for everyday setup.
Step-by-step:
- Open Windows Settings by pressing: Windows key + I
- Alternatively: Click Start menu > Settings gear icon
- Navigate to Sound settings:
- In left sidebar, click System
- In the main panel, click Sound
- You’re now in Sound settings
- Locate the Input section (usually shows “Choose where to listen from”)
- Click the dropdown menu under “Input device” or “Default microphone”
- Browse available microphones:
- Currently active device appears at top
- Connected devices appear below
- Disabled or unplugged devices may appear grayed out
- USB devices show their manufacturer name
- Bluetooth devices show their device name
- Select your preferred microphone by clicking it
- Wait 2-3 seconds for Windows to apply the change
- Test it: Speak into the microphone and watch the input level meter move. If the meter responds, it’s working correctly.
- Optional: Rename your device:
- Click Device properties below the dropdown
- Click Rename and type a memorable name (e.g., “Gaming Headset” instead of “USB Audio Device 1”)
- This makes future identification easier
- Settings save automatically—no Save button needed
Best for: Setting a device that stays as your default across restarts and apps
Time needed: 30-60 seconds
Advantage: Simple interface, persistent settings, good for most users
Limitation: Doesn’t give access to advanced settings like sample rates or exclusive mode
Method 3: Advanced Control (Control Panel – Power User Method)
Windows Control Panel is the older interface that contains powerful options the Settings app doesn’t expose. Use this when you need precise technical control.
Step-by-step:
- Open Control Panel:
- Press Windows key + R to open Run dialog
- Type:
control paneland press Enter - Alternatively: Click Start > type “Control Panel” > press Enter
- Navigate to Hardware and Sound:
- Look for category labeled “Hardware and Sound”
- Click it to expand
- Click the “Sound” option:
- Several sound-related options appear
- Click exactly on “Sound” (not “Speakers” or other options)
- The Recording tab opens (this is your input devices tab)
- Review all microphones on Recording tab:
- Each input device appears as a separate line
- Active device has a green checkmark
- Devices with red X are disconnected or have driver problems
- Double-click any device to test it with a sound
- Set your desired microphone as default:
- Right-click the microphone you want
- Select “Set as Default Device” from menu
- A green checkmark appears
- This device now receives audio from all apps
- Optionally set a separate communication device:
- Right-click a different microphone
- Select “Set as Default Communication Device”
- A green phone icon appears
- During calls (Zoom, Teams, Skype), Windows prioritizes this device
- This allows your headset for calls while your USB mic handles other apps
- Configure advanced properties (if needed):
- Right-click any microphone > Properties
- Go to “Advanced” tab
- Choose sample rate:
- 16-bit, 48000 Hz = Standard (most apps, calls)
- 24-bit, 48000 Hz = Better quality (podcasting, recording)
- 24-bit, 192000 Hz = Professional (rarely needed)
- Check Enhancements tab:
- Disable all enhancements (echo cancellation, noise reduction)
- These can cause audio artifacts
- Better to handle these in your recording app
- Click Apply, then OK to save changes
Best for: Professional use, multiple microphones, advanced audio settings
Time needed: 2-3 minutes
Advantage: Access to sample rates, exclusive mode, separate communication device
Limitation: More complex interface, can be intimidating for beginners
Method 4: Route Apps to Different Microphones (Windows 11+ Advanced)
This is the most powerful feature: assign different apps to different microphones. Imagine recording with your USB mic while your headset handles video calls simultaneously.
Step-by-step:
- Requirements: Windows 11 build 22000 or later (Check: Settings > System > About)
- Open Windows Settings (Windows key + I)
- Navigate to Sound settings:
- Click System in left sidebar
- Click Sound in main panel
- Scroll down to “Advanced” section:
- Look for “App volume and device preferences”
- This option appears about halfway down
- Click “App volume and device preferences”:
- New window opens listing all your apps
- Each app has its own dropdown for input device selection
- Find the app you want to configure:
- Scroll list to find your app
- Example: Find “Zoom” to assign specific mic to video calls
- Example: Find “Audacity” to assign recording app to your USB mic
- If app doesn’t appear, open it once then return here
- Click the input device dropdown next to each app:
- Select which microphone this specific app should use
- Choose from any connected audio input device
- Repeat for each app you want custom routing:
- Zoom → Your gaming headset
- OBS Studio → Your professional USB mic
- Discord → Your Bluetooth headset
- Your DAW (music software) → Your condenser mic
- Podcast app → Your XLR setup
- Changes apply immediately (no restart needed)
- Test each app to confirm it’s using the right mic
Best for: Power users with multiple microphones, content creators with complex setups
Time needed: 10-15 minutes total (one-time setup)
Advantage: Maximum flexibility, automatic routing, no manual switching needed
Limitation: Only in Windows 11, slightly complex setup, requires initial time investment
Comparison Table: Which Method Is Right for Your Situation?
| Need | Method | Reason | Difficulty |
|---|---|---|---|
| “I need to switch mics RIGHT NOW” | Method 1 (Quick Settings) | Fastest possible, takes seconds | Very Easy |
| “I want one mic as my permanent default” | Method 2 (Settings App) | Simple interface, persistent settings | Easy |
| “I need control over sample rates & settings” | Method 3 (Control Panel) | Advanced options, professional control | Medium |
| “I want Zoom on headset, recording on USB mic” | Method 4 (Per-App Routing) | Individual app assignment, most flexible | Medium |
| “I use a separate device for calls vs media” | Method 3 (Control Panel) | Only place to set communication device | Medium |
| “I’m a content creator/podcaster” | Method 3 (Control Panel) | Full control over audio settings | Medium |
| “I just want simple defaults” | Method 2 (Settings App) | Easiest to understand | Easy |
| “I have lots of microphones connected” | Method 4 (Per-App Routing) | Automatic routing per app | Medium |
Testing Your Microphone: Make Sure It’s Actually Working
Quick Test (Right Now)
- Open Settings > System > Sound
- Under Input section, look for “Test your microphone”
- Click the “Start test” button
- Speak clearly into your microphone for 5 seconds
- Watch the input level meter—it should show movement as you speak
- If the meter doesn’t move, your microphone isn’t working
Detailed Level Testing
- Control Panel > Sound > Recording tab
- Right-click your microphone > Properties
- Go to “Levels” tab
- You’ll see two sliders: “Microphone” and “Microphone Boost”
- Microphone slider: Set to 75-85% for normal speech
- Microphone Boost: Leave at 0 dB to 10 dB (not higher—causes distortion)
- Speak normally into the mic while watching the level
- Click OK to save
What to Listen For in Your Test
- Ideal sound: Clear voice without distortion, minimal background noise, consistent volume
- Problem sound: Muffled voice (increase input levels), crackling (lower Microphone Boost), echo (your speakers are too close to mic)
Troubleshooting: When Your Microphone Isn’t Working
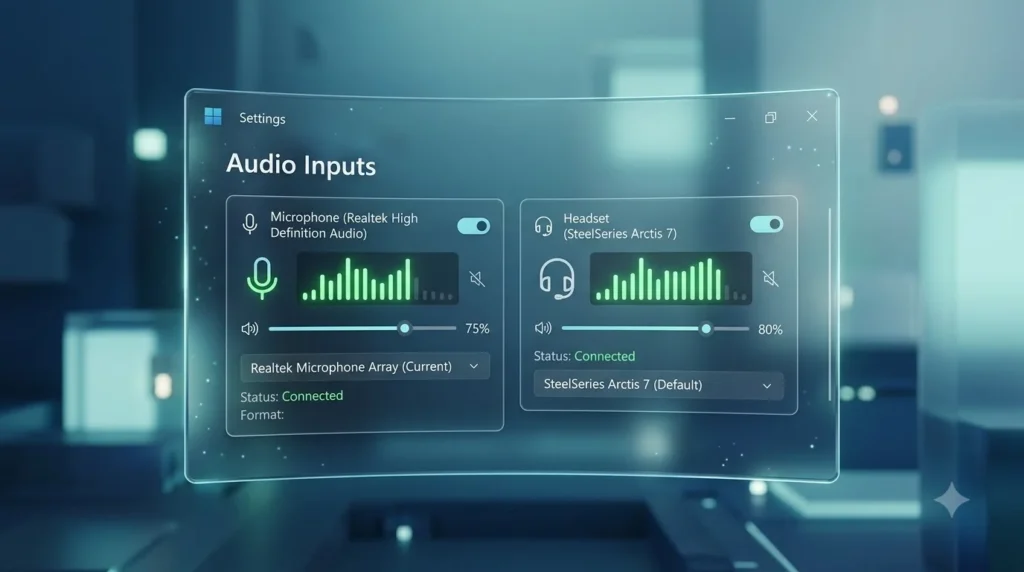
Problem 1: “Windows Doesn’t Recognize My Microphone at All”
Systematic diagnostic process:
Step 1 – Check physical connections (1 minute):
- USB devices: Unplug and wait 3 seconds, then replug
- 3.5mm jacks: Ensure fully inserted (should feel a click)
- Bluetooth: Ensure device is turned on and in pairing mode
- Check the mic itself for physical damage
Step 2 – Show hidden devices (2 minutes):
- Open Control Panel > Sound > Recording tab
- Right-click in empty space
- Select “Show Disabled Devices” and “Show Disconnected Devices”
- If your mic appears now, right-click it and select “Enable”
Step 3 – Update or reinstall drivers (5-10 minutes):
- Right-click Start menu > Open Device Manager
- Expand “Audio inputs and outputs”
- Right-click your microphone device
- Select “Update driver”
- Choose “Search automatically for updated driver software”
- Windows searches and installs latest driver
- May require restart
Step 4 – Check privacy settings (2 minutes):
- Settings > Privacy & security > Microphone
- Ensure “Microphone access” is turned ON
- Scroll down to “Allow apps to access your microphone”
- Ensure your app (Zoom, Teams, etc.) shows as “Allowed”
Step 5 – Restart audio service (3 minutes):
- Press Windows key + R
- Type:
services.mscand press Enter - Find “Windows Audio” in the list
- Right-click it > Restart
- Wait 10 seconds
- Test audio again
Time to complete: 15-20 minutes
Problem 2: “My Microphone Works But Sounds Muffled or Quiet”
Solution sequence:
Step 1 – Check input levels (2 minutes):
- Control Panel > Sound > Recording > Your device > Properties
- Levels tab
- Increase “Microphone” slider to 80-90%
- Increase “Microphone Boost” to 10-20 dB (test as you go)
- Speak while watching meters—they should respond
Step 2 – Disable audio enhancements (2 minutes):
- Same Properties window > Enhancements tab
- Look for “Noise Reduction,” “Echo Cancellation,” or “Loudness Equalization”
- Uncheck all of these (enhancements often cause problems)
- Some USB mics have enhancements that conflict with Windows
- Click OK
Step 3 – Change sample rate (2 minutes):
- Properties > Advanced tab
- Default Format dropdown
- Select “24 bit, 48000 Hz” (better quality than 16-bit)
- Click OK
Step 4 – Try a different USB port (2 minutes):
- For USB microphones, try each USB port on your computer
- USB 3.0 ports (often blue inside) work better than older USB 2.0
- Avoid USB hubs—connect directly to computer
Time to complete: 8-10 minutes
Problem 3: “There’s Echo or Feedback in My Microphone”
Causes and fixes:
| Cause | What’s Happening | Fix |
|---|---|---|
| Speaker too close to mic | Mic picks up its own output from speaker | Move speaker away or use headphones |
| Using laptop speakers during call | Feedback loop between mic and speaker | Switch to headset microphone instead |
| Echo cancellation disabled | Software not detecting its own audio | Enable echo cancellation in app settings (Zoom, Teams) |
| Microphone gain too high | Everything gets amplified including speaker output | Lower Microphone Boost to 0-10 dB |
| Two devices capturing same audio | Multiple mics recording at once | Disable unused microphones in Control Panel |
Problem 4: “An App Can’t Access My Microphone”
Diagnostic checklist:
- Check app permissions:
- Settings > Privacy & security > Microphone
- Scroll to “Allow apps to access your microphone”
- Find your app in the list
- If toggle shows OFF, click it to turn ON
- If app doesn’t appear, it hasn’t requested permission yet
- Grant permission to app:
- Some apps show a prompt the first time
- Look for “Allow,” “Deny,” or “Always deny” buttons
- Click “Allow” if you want the app to use your microphone
- Reinstall app if problem persists:
- Right-click Start > Apps > Installed apps
- Find your app
- Click the three dots > Uninstall
- Restart computer
- Download and reinstall app from official source
- Grant permissions when prompted
- Run app as administrator (last resort):
- Right-click app shortcut > Properties
- Advanced > Check “Run as administrator”
- Click OK
- This sometimes helps with stubborn permission issues
Time to complete: 5-10 minutes
Advanced Tips for Podcasters, Streamers & Content Creators
For Podcasters & YouTubers
Optimal setup:
- USB condenser microphone (provides professional sound without expensive XLR equipment)
- Positioned 6-8 inches from your mouth at slight angle
- Pop filter in front (prevents plosives—the “p” and “b” sounds)
- Foam windscreen around microphone (reduces handling noise)
- Audio editing software with noise gate (removes background sounds)
Windows configuration:
- Set USB mic as default in Settings app
- In your recording software, select the USB mic specifically
- Set sample rate to 24-bit, 48000 Hz in Windows
- Disable all audio enhancements (these cause artifacts)
- In recording software, use noise gate and compression
Why this matters: Professional audio is your competitive advantage. People forgive video quality but not audio quality.
For Streamers (Twitch, YouTube Live)
Optimal setup:
- Gaming headset or USB microphone (provides both chat audio and stream audio)
- Use OBS Studio (free, professional streaming software)
- Configure separate audio tracks for mic, game audio, alerts
Windows configuration:
- Set your microphone as default in Settings
- In OBS, under Audio, assign microphone input to your device
- Test levels before going live (your voice should peak at -6 to -3 dB)
Pro tip: Stream test first. Start a live stream but don’t announce it. Test for 5 minutes, check your audio on the broadcast, then shut down. Adjust settings if needed, then go live for real.
For Musicians & Music Producers
Optimal setup:
- Condenser microphone (captures detail for vocals)
- Audio interface with preamp (improves microphone signal)
- XLR cables (professional standard, better than USB)
- Studio monitors and headphones (for accurate monitoring)
- DAW software (Ableton, FL Studio, Logic, Pro Tools, etc.)
Windows configuration:
- Set audio interface as default in Settings
- In Control Panel > Sound > Properties > Advanced
- Set to 24-bit, 192000 Hz (maximum quality)
- Enable “Allow exclusive control”
- In your DAW, use ASIO or WASAPI drivers (lowest latency)
- Disable all Windows audio enhancements
Why this matters: Your microphone quality determines your recording quality. Even great vocals sound amateur on a $10 microphone.
Quick Reference Table: Troubleshooting Symptoms & Fixes
| What’s Wrong | Immediate Fix | Time | Next Step If Still Broken |
|---|---|---|---|
| Microphone not listed in Settings | Reconnect device; wait 5 seconds | 1 min | Show Disabled Devices in Control Panel |
| Input device listed but won’t activate | Restart Windows Audio service (services.msc) | 3 mins | Update drivers through Device Manager |
| Audio is very quiet | Increase Microphone slider to 80-90% | 1 min | Lower Microphone Boost if it’s already high |
| Sound is crackling or distorted | Lower Microphone Boost slider to 0-10 dB | 1 min | Disable audio enhancements in Properties |
| Terrible echo during calls | Switch to headset mic instead of speaker | 1 min | Enable echo cancellation in app settings |
| App says no permission to use mic | Go to Privacy > Microphone > Allow app | 1 min | Reinstall app and grant permissions again |
| Bluetooth mic keeps disconnecting | Repair the Bluetooth device | 2 mins | Update Bluetooth drivers |
| Background noise is really loud | Lower Microphone Boost; use noise gate in app | 2 mins | Close background apps; turn off fans/AC |
| One USB device works, another doesn’t | Try different USB port (prefer USB 3.0) | 2 mins | Try different cable; check device compatibility |
| Microphone input level doesn’t move | Check device is actually selected in Settings | 2 mins | Reinstall drivers; test different port |
Understanding Microphone Technical Settings (For Enthusiasts)
Sample Rate Explained
Sample rate is how many times per second Windows captures your voice.
- 44,100 Hz: CD quality (older standard, fine for calls)
- 48,000 Hz: Professional standard (podcasts, streaming, recording)
- 96,000 Hz: High-resolution (overkill for most uses)
- 192,000 Hz: Ultra-HD (rarely needed except for professional music)
What to set yours to:
- Casual calls: Leave default
- Podcasting/streaming: Set to 48,000 Hz
- Music recording: Set to 48,000 Hz minimum
Bit Depth Explained
Bit depth is how much detail is captured in each audio sample.
- 16-bit: Standard (calls, meetings, voice)
- 24-bit: Professional (podcasts, streaming, music)
- 32-bit: Ultra high fidelity (professional studios only, rarely needed)
What to set yours to:
- Just setting: Leave default
- Podcasting: 24-bit minimum
- Music production: 24-bit or higher
Microphone Boost Explained
Microphone Boost amplifies your voice before sending it to the app.
- 0 dB: No amplification (quieter but clearer)
- 10 dB: Slight amplification (good for soft speakers)
- 20 dB: Heavy amplification (can cause distortion)
What to set yours to:
- If your voice is naturally loud: 0-5 dB
- If you speak quietly: 10-15 dB
- Never go above 20 dB (causes crackling)
Connecting to Authoritative Resources (For Deep Learning)
To learn more about fixing microphone and input device problems, consult Microsoft’s official microphone troubleshooting guide, which covers permission issues and common problems.
For professional microphone setup and recording best practices, reference Shure’s microphone technique guide, which is the industry authority on proper microphone positioning and usage.
For audio interface configuration and ASIO driver setup, explore this comprehensive guide on configuring Windows default playback devices, which covers both input and output audio routing for professional setups.
Best Practices for Ongoing Audio Input Device Management
Daily Habits
- Before important calls, test your microphone using the Settings test feature
- Listen to yourself through headphones to catch audio issues early
- Close unnecessary apps that might compete for audio input
- Keep your microphone clean (dust degrades sound quality)
Weekly Maintenance
- Test all your microphones to ensure they’re still working properly
- Check that your default microphone is still the one you intended
- Listen for any new background noise or audio quality changes
- Update any microphone firmware if available
Monthly Updates
- Check for audio driver updates through Device Manager
- Review and update Bluetooth devices if firmware updates are available
- Verify that your privacy settings still allow microphone access
- Clean or replace pop filters and foam windscreens if damaged
Quarterly Deep Dive
- Remove disabled devices from your system (Control Panel > Recording)
- Test all your microphones one-by-one
- Document which microphone works best for which application
- Delete apps you no longer use (reduces clutter in App volume preferences)
Frequently Asked Questions
Q: Can I use two microphones at the same time in Windows? A: Not natively. However, software like VB-Audio Virtual Audio Cable can create a virtual microphone that combines multiple inputs.
Q: Why does my Bluetooth mic have a delay (lag)? A: Bluetooth has inherent latency (120-150ms). Wired USB microphones have virtually zero latency. For real-time communication, wired is better.
Q: Will changing my microphone settings affect my video call quality? A: Only the audio part. Video settings are separate. However, better audio configuration absolutely improves the overall call quality.
Q: Should I enable exclusive mode for regular calling? A: No. Exclusive mode is only for professional audio software. For calls, leave it disabled.
Q: Why does my microphone pick up my keyboard typing? A: The microphone gain is too high. Lower the Microphone Boost slider to 0-10 dB.
Q: Can I have different microphones for different apps? A: Yes, with Windows 11 per-app routing. Or you can use a physical audio mixer.
Q: Is my built-in laptop microphone good enough for podcasting? A: Not ideal, but possible. A $60 USB microphone sounds significantly better. Once you invest in better equipment, people will notice the difference.
Q: Why does my microphone sound like it’s underwater? A: Sample rate mismatch. Set both Windows and your app to the same sample rate (typically 48000 Hz).
Summary: Your Action Plan for Today
Next 15 minutes:
- Identify what microphones you own and want to use
- Choose which method (1-4) fits your needs
- Set your preferred microphone as default using that method
- Test your microphone to confirm it’s working
This week:
- If you use multiple microphones, configure them all using your chosen method
- Set up per-app routing if you use Windows 11 and need different mics for different apps
- Test all your microphones and update drivers if any don’t work
- Rename your devices to something memorable (e.g., “Gaming Headset” instead of “USB Device”)
This month:
- Document which microphone works best for which task
- Keep audio drivers updated
- Test your microphone once weekly to catch problems early
- Update privacy settings to ensure apps can access your microphone
Final Thoughts: Better Audio Starts With Better Management
Managing your audio input devices isn’t complicated once you understand the process. It’s simply about knowing where your microphone is, making sure Windows sees it, and ensuring the right app uses it.
Most audio problems—bad call quality, muffled recordings, mysterious echoes—aren’t actually problems with your equipment. They’re problems with configuration. A $30 headset with proper configuration sounds better than a $300 professional microphone that’s incorrectly set up.
Spend 15 minutes this week configuring your microphone properly, and you’ll reap the benefits for months. Your video calls will be clearer. Your recordings will sound professional. Your frustration with audio problems will disappear.
That’s the power of managing your audio input devices correctly.