
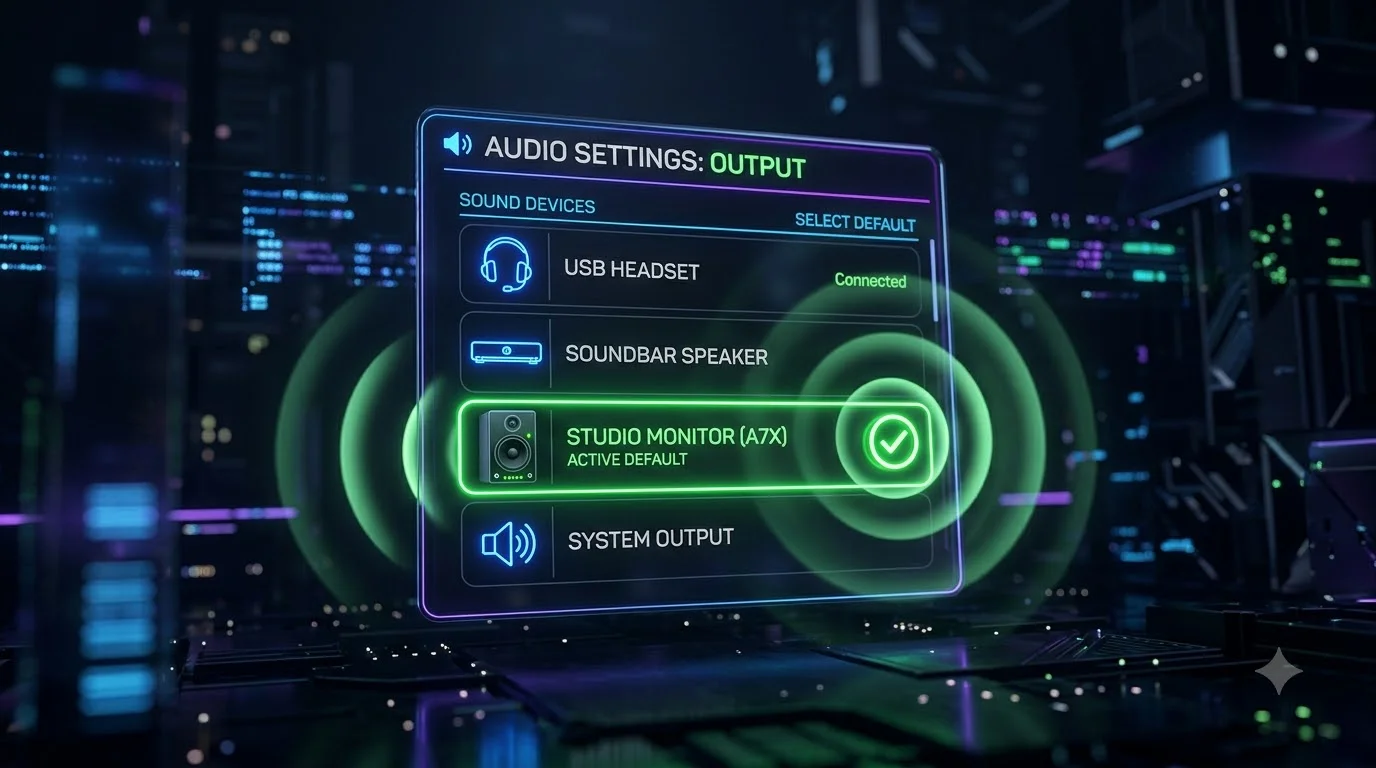
Every day, millions of Windows users experience audio problems they don’t realize are fixable with proper playback device configuration. Your computer sits there, ready to produce crystal-clear sound, but instead you’re hearing nothing from your speakers, or audio is mysteriously routing to a device you didn’t select.
The problem isn’t usually your hardware—it’s that Windows isn’t routing audio to the right place.
Think about it: you’re on an important video call through Zoom, but suddenly your audio blasts through your TV speakers instead of your headset microphone. Or you’re trying to watch a video, but nothing comes out because Windows defaulted to an unplugged speaker. These situations are incredibly common, and they’re all solved by understanding how to configure your default playback devices correctly.
This guide walks you through everything—from basic setup to advanced troubleshooting—so you can master your audio settings once and for all.
What Exactly Is a “Default Playback Device”? (Simple Explanation)
A default playback device is Windows’s primary choice for where audio goes when you press play. It’s the audio output destination your computer automatically selects when you:
- Watch YouTube videos
- Take a video conference call
- Play music or podcasts
- Enjoy gaming sessions
- Listen to system notifications and alerts
Common playback devices you might own:
- Laptop or desktop built-in speakers
- Wireless Bluetooth headphones or earbuds
- Wired headphones connected via 3.5mm jack
- USB-C earbuds (common on modern laptops)
- External Bluetooth speakers for your room
- Monitor speakers (when connected via HDMI or DisplayPort)
- Professional USB audio interfaces for music production
- Gaming headsets with USB connections
- Wireless earbuds using 2.4 GHz dongles
- HDMI sound bars connected to your display
The moment you plug in a new audio device or pair a Bluetooth headset, Windows doesn’t automatically switch to it as your default. That’s why you need to manually configure it—something most users never learn to do.
Why This Skill Matters: The Real-World Impact
Scenario 1: The Conference Call Disaster
You’re presenting to your company in a Zoom meeting. Important stakeholders are listening. Suddenly, your built-in laptop microphone picks up background noise because your headset wasn’t properly set as the default communication device. Audio quality suffers, and you lose credibility.
Solution: Setting a default communication device (separate from your media device) prevents this entirely.
Scenario 2: The Gaming Frustration
You bought an expensive gaming headset last week. In-game audio works fine through it, but then you open Spotify, and suddenly the music blasts through your TV speakers at full volume. Your partner jumps, the kids look up from their homework, and you look clueless fumbling with settings.
Solution: Understanding per-app playback routing solves this permanently.
Scenario 3: The Privacy Concern
Your Bluetooth speaker is accidentally still paired. You’re watching something private on your laptop when Windows routes audio through the living room speaker. Everyone hears everything. Embarrassing. Avoidable.
Solution: Proper default device management prevents accidental audio broadcasting.
Scenario 4: The Audio Quality Mystery
You just purchased a USB audio interface (a professional-grade device), spent money on good headphones, but the audio still sounds compressed and tinny. The issue? Windows is upscaling your 24-bit audio to 32-bit through a mismatched sample rate.
Solution: Configuring sample rates and exclusive mode in playback device settings unlocks true audio quality.
Quick Comparison: All Playback Devices & When to Use Each One
| Device Type | Connection Type | Best Use Case | Audio Quality | Latency | Typical Cost (USD) |
|---|---|---|---|---|---|
| Built-in Laptop Speakers | Internal hardware | Casual listening, meetings | Fair (tinny) | Very low | $0 (included) |
| Standard 3.5mm Headphones | 3.5mm jack | Private listening, music | Good | Very low | $15-100 |
| Bluetooth Headphones | Wireless Bluetooth | Mobility, calls on-the-go | Good-Excellent | Low-Medium | $50-300 |
| External Bluetooth Speaker | Wireless Bluetooth | Room audio, parties | Good | Medium | $40-200 |
| USB-C Earbuds | USB-C or USB-A | Modern phones/laptops | Excellent | Very low | $50-200 |
| Gaming Headset (USB) | USB connection | Gaming, streaming | Excellent | Very low | $60-300 |
| Monitor Speakers (HDMI) | HDMI or DisplayPort | Desk audio | Fair-Good | Medium | $0-200 |
| Professional USB Audio Interface | USB (high-speed) | Music production, recording | Excellent (24-bit/192kHz) | Very low | $100-1000+ |
| Wireless Earbuds (2.4GHz) | Proprietary wireless dongle | Gaming, low-latency needs | Excellent | Very low | $80-250 |
| Surround Sound Speaker System | Bluetooth, optical, or HDMI | Home theater, immersive gaming | Excellent | Medium | $200-2000+ |
The Complete Step-by-Step Guide: 4 Methods to Configure Your Playback Device
Method 1: The Quick Way (Modern Windows 11/10 Interface)
This is your fastest option when you need to switch devices right now. Perfect for switching between your headset and speakers multiple times daily.
Step-by-step instructions:
- Locate the speaker icon in your system tray (bottom-right corner of your taskbar, next to the clock and notification icons)
- Click the speaker icon once. A small menu appears showing your current volume level
- Look for a small arrow or chevron icon next to your current device name. Click it to expand the device list
- Browse the device list showing all connected audio outputs:
- Connected Bluetooth devices show with a Bluetooth icon
- USB devices show their manufacturer name
- Built-in speakers are labeled “Speakers” or your computer model name
- HDMI audio appears as “HDMI Audio” or monitor name
- Select your preferred device by clicking it. Audio immediately switches to that device
- Optional: If you want more advanced options, click “Open sound settings” at the bottom of this menu
Why use this method:
- Fastest possible switching
- No menus or settings apps to navigate
- Works in seconds
- Perfect while you’re already doing something else (working, gaming, watching)
Time to complete: 5-10 seconds
Method 2: The Permanent Setup (Windows Settings—Recommended for Most Users)
Use this method when you want to set a device as your permanent default, and you’re fine with it being your default for all apps.
Step-by-step instructions:
- Open Windows Settings by pressing these keys simultaneously: Windows key + I
- Alternative: Click Start menu > Settings gear icon
- Navigate to Sound settings:
- In the left sidebar, click System
- In the System menu, click Sound
- You’re now in the Sound settings panel
- Look at the “Output” section (typically shown as “Choose where to play sound”)
- Click the dropdown menu under “Output device” or “Default playback device”
- Review all available devices in the dropdown:
- Devices show in order of connection type
- Currently active device has a checkmark or appears highlighted
- Disabled or disconnected devices appear grayed out
- Select your desired playback device by clicking it
- Wait 2-3 seconds for Windows to apply the change (you’ll hear audio switch)
- Optional advanced settings:
- Click Device properties below the dropdown to:
- Rename the device to something memorable
- Test the device with a sound
- View technical specifications
- Disable or troubleshoot the device
- Click Device properties below the dropdown to:
- Settings save automatically—no “OK” or “Save” button needed
Why use this method:
- Sets a persistent default that stays across restarts
- Simple, modern interface
- Shows all connected and disconnected devices
- Provides device properties for naming and testing
- Recommended for most everyday users
Time to complete: 30-45 seconds
Method 3: The Advanced Route (Control Panel for Power Users)
Windows Control Panel is the older, more powerful interface. It contains advanced options that Settings doesn’t expose. Use this when you need precise control.
Step-by-step instructions:
- Open Control Panel:
- Press Windows key + R to open “Run” dialog
- Type:
control paneland press Enter - Alternative: Click Start > type “Control Panel” > press Enter
- Find Hardware and Sound:
- Look for the category labeled “Hardware and Sound”
- Click it to expand this category
- Click the “Sound” option:
- You’ll see several sound-related options
- Click exactly on “Sound” (not “Speakers” or other options)
- The Playback tab opens automatically
- Review all devices on the Playback tab:
- Each playback device appears as a separate line
- Currently active device has a green checkmark
- Devices with red X are disconnected or have driver issues
- Double-click any device to test it with a sound
- Set your desired device as default:
- Right-click the device you want
- Select “Set as Default Device” from the context menu
- A green checkmark appears on that device
- Optional—Set a separate communication device:
- Right-click a different device
- Select “Set as Default Communication Device”
- This is crucial if you want calls going to your headset while media plays through speakers
- A green phone icon appears on the communication device
- Configure advanced properties (if needed):
- Right-click any device and select “Properties”
- Go to the “Advanced” tab
- Change sample rate to match your audio quality needs:
- 16-bit, 48,000 Hz = standard (most YouTube, Spotify, Netflix)
- 24-bit, 192,000 Hz = high fidelity (audiophile music, professional audio)
- Check “Exclusive Mode” only if using professional audio software
- Click Apply, then OK to save all changes
Why use this method:
- Access to advanced audio formats and settings
- Separate default for media and communication devices
- Ability to see and manage disabled devices
- Control over sample rates and exclusive mode
- Better troubleshooting capabilities
- Perfect for audio professionals and gamers
Time to complete: 2-3 minutes
Method 4: Per-App Audio Routing (Windows 11+ Advanced Feature)
This is the most powerful method: route different apps to different devices. Imagine Zoom on your headset while Spotify plays through your speakers.
Step-by-step instructions:
- Open Windows Settings (Windows key + I)
- Navigate to Sound settings:
- Click System in left sidebar
- Click Sound in the main panel
- Scroll down to “Advanced” section:
- Look for “App volume and device preferences”
- This option appears about halfway down the Sound settings page
- Click “App volume and device preferences”:
- A new window opens listing all your apps
- Each app has its own dropdown for output device selection
- Find the app you want to configure:
- Scroll through the list to find your app
- Example: Find “Zoom” for video calls or “Spotify” for music
- If your app doesn’t appear, it hasn’t been launched yet—open it once, then return here
- Click the output device dropdown next to each app:
- Select which playback device this app should use
- Choose from any connected audio output device
- Repeat for each app you want to customize:
- Zoom → Your gaming headset
- Spotify → Your desk speakers
- YouTube → Your Bluetooth speaker
- Discord → Your headset
- Game → Your surround sound system
- Changes apply immediately (restart not needed)
Why use this method:
- Maximum flexibility and control
- Take calls on headset while media plays through speakers
- No switching required—Windows handles routing
- Perfect for people with multiple audio devices
- Prevents accidental audio to wrong device
Time to complete: 5-10 minutes (one-time setup, then automatic)
Important note: This feature only works on Windows 11 (build 22000 and later). Windows 10 users should use Method 3 (Control Panel) instead.
Comparison Table: Which Method Should You Use?
| Situation | Recommended Method | Reason |
|---|---|---|
| “I need to switch devices quickly” | Method 1 (Quick Way) | Takes 5-10 seconds, no menus |
| “I want one permanent default for everything” | Method 2 (Settings) | Simple, modern, sets persistent default |
| “I use multiple devices and need advanced control” | Method 3 (Control Panel) | Access to sample rates, exclusive mode |
| “I want Zoom on headset, music on speakers” | Method 4 (Per-App Routing) | Route individual apps to different devices |
| “I need to set up communication device separately” | Method 3 (Control Panel) | Only place to set communication default |
| “I’m a music producer or gamer” | Method 3 (Control Panel) | Control sample rates, latency, bit depth |
| “I’m new to this and just want simple defaults” | Method 2 (Settings) | Easiest to understand and use |
| “I’m using Windows 11 and want maximum control” | Method 4 (Per-App Routing) | Latest features, most flexibility |
Troubleshooting: Why Your Playback Device Isn’t Working
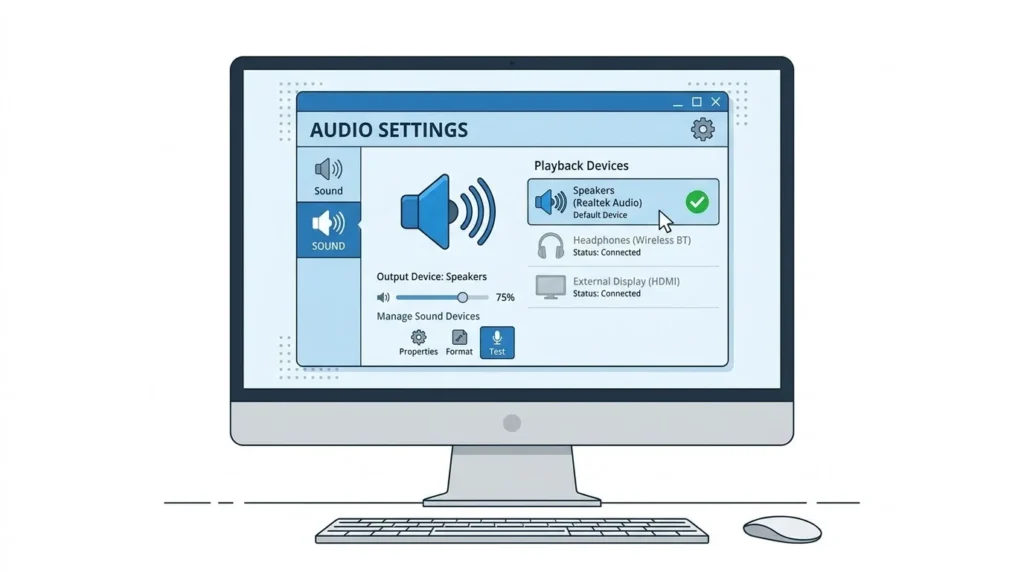
Problem 1: “I Set a Default But Audio Still Goes to Wrong Device”
Common causes and solutions:
- An app has its own routing set (Windows 11+)
- Open Settings > System > Sound > App volume and device preferences
- Look for your app in the list
- Change its output device to “System default” or your intended device
- This makes the app follow your main default instead of its individual setting
- Bluetooth device disconnected but still shows as default
- Go to Settings > System > Sound
- Select a different device as default (one that’s actually connected)
- Try to pair the Bluetooth device again if you need it
- USB device not recognized properly
- Disconnect and reconnect the USB cable
- Wait 3-5 seconds for Windows to recognize it
- Return to your playback device settings—it should now appear
When to do this: Right when you notice the problem (audio going to wrong place)
Time to fix: 1-2 minutes
Problem 2: “No Audio Is Playing at All”
Checklist to follow in order:
- Verify the device is connected:
- Bluetooth: Check if headphones are paired and show “Connected” status
- USB: Physically inspect the cable connection; try a different USB port
- 3.5mm: Ensure the jack is fully inserted
- HDMI: Check both the HDMI cable and the monitor/TV connection
- Check if the device is set as default:
- Open Settings > System > Sound
- Confirm your device appears in the Output dropdown
- If it doesn’t appear, reconnect it and refresh the settings page
- Verify the device isn’t muted:
- Look at the device in Settings—if there’s a volume slider, ensure it’s not at 0%
- Right-click the speaker icon in system tray—ensure your device isn’t muted there
- Some devices have physical mute switches (gaming headsets, external speakers)—check these
- Restart the Windows Audio service:
- Press Windows key + R to open Run dialog
- Type:
services.mscand press Enter - Find “Windows Audio” in the list
- Right-click it and select “Restart”
- Wait 5 seconds and test audio again
- Update your audio drivers:
- Right-click Start menu and select “Device Manager”
- Expand the “Sound, video and game controllers” section
- Right-click your audio device and select “Update driver”
- Choose “Search automatically for updated driver software”
- Wait for the process to complete (may require restart)
Time to fix: 5-15 minutes
Problem 3: “My Device Isn’t Even Listed in Playback Devices”
Systematic troubleshooting:
- Enable viewing of disabled devices:
- Open Control Panel > Hardware and Sound > Sound
- Right-click anywhere in the empty space of the device list
- Select “Show Disabled Devices”
- If your device appears now, right-click it and select “Enable”
- Check if the device has driver issues:
- Open Device Manager (Right-click Start > Device Manager)
- Expand “Sound, video and game controllers”
- Look for any devices with yellow warning triangle (!)
- Right-click them and select “Update driver”
- If update doesn’t help, select “Uninstall device”
- Right-click in empty space and select “Scan for hardware changes”
- Windows reinstalls the device with fresh drivers
- Verify BIOS/UEFI settings (for built-in audio):
- Restart your computer and press the BIOS key during startup (usually Del, F2, or F12)
- Look for “Onboard Audio” or “Audio Device” settings
- Ensure it’s set to “Enabled”
- Save changes and restart
- Try a different USB port:
- If using a USB device, try each USB port on your computer
- Some USB ports have different performance characteristics
- USB 3.0 ports (blue inside) work better than USB 2.0 ports
Time to fix: 10-20 minutes
Problem 4: “Audio Quality Is Poor (Crackling, Compression, Tinny Sound)”
Audio quality troubleshooting:
- Check sample rate settings:
- Open Control Panel > Sound > Playback tab
- Right-click your device and select “Properties”
- Go to the “Advanced” tab
- Look at the “Default Format” dropdown
- If streaming music: Select “24 bit, 48000 Hz (Studio Quality)”
- If audiophile listening: Select “24 bit, 192000 Hz (HD Audio)”
- If lower quality media: Select “16 bit, 44100 Hz (CD Quality)”
- Disable audio enhancements:
- Right-click your device > Properties
- Go to the “Enhancements” tab
- Check if “Loudness Equalization” or “Bass Boost” is enabled
- Disable all enhancements by checking “Disable all enhancements”
- Click Apply > OK
- Enable exclusive mode (for professional audio only):
- Right-click device > Properties
- Advanced tab
- Check “Allow applications to take exclusive control of this device”
- This helps professional audio software but may affect system sounds
- Update audio drivers:
- Open Device Manager
- Right-click your sound device
- Select “Update driver”
- Choose manufacturer’s website for best results (NVIDIA for graphics audio, Intel for integrated audio, etc.)
Time to fix: 5-10 minutes
Advanced Configuration for Specific Use Cases
For Video Conferencing (Zoom, Teams, Google Meet)
Optimal setup:
- Set primary default to your primary working space device (headset or speakers)
- Set communication device separately to your headset microphone
- In app settings, confirm the app sees your device correctly
Why this matters: Communication devices take priority during calls. Even if your main default is speakers, calls will use your communication device (headset). This prevents embarrassing situations where everyone hears your surroundings.
Setup steps:
- Control Panel > Sound > Playback
- Right-click your headset > “Set as Default Communication Device”
- Right-click your speakers > “Set as Default Device” (for general media)
- In Zoom/Teams settings, confirm devices match
For Gaming and Streaming
Optimal setup:
- Set gaming headset as default playback device
- Enable low-latency mode for minimal audio delay
- Use exclusive mode in professional game audio settings
Why this matters: Gaming requires ultra-low latency (under 20ms). Compression or delay ruins immersion and hurts competitive performance. Exclusive mode bypasses Windows’s audio processing for raw performance.
Setup steps:
- Control Panel > Sound > Playback
- Right-click gaming headset > Properties > Advanced
- Check “Exclusive Mode”
- Set sample rate to 24 bit, 48000 Hz minimum
- In game settings, confirm the headset is selected
For Music Production and Audio Editing
Optimal setup:
- Set professional USB audio interface as default
- Use 24-bit, 192,000 Hz sample rate
- Enable exclusive mode to prevent system sounds
- Configure software to use ASIO or WASAPI drivers
Why this matters: Professional audio requires highest possible quality and lowest possible latency. Standard Windows audio routing introduces delays and quality loss unacceptable for production.
Setup steps:
- Control Panel > Sound > Playback
- Right-click your audio interface > Properties
- Advanced tab > Set to 24 bit, 192,000 Hz
- Check “Allow exclusive control”
- In your DAW (Ableton, Pro Tools, etc.), select ASIO or WASAPI driver
- Disable all Windows audio enhancements
Table: Troubleshooting Quick Reference
| Problem | Cause | Solution | Time |
|---|---|---|---|
| No sound at all | Device not set as default or muted | Check device connections, set default, unmute | 5 mins |
| Wrong device playing | Per-app routing override or device priority | Check app settings or Control Panel default | 2 mins |
| Device missing from list | Device disabled, disconnected, or needs driver | Enable in device list or reinstall driver | 10 mins |
| Crackling/poor quality | Wrong sample rate or enhancements enabled | Adjust sample rate, disable enhancements | 5 mins |
| Bluetooth not connecting | Pairing issue or driver problem | Re-pair device or update Bluetooth drivers | 10 mins |
| One app plays wrong device | Per-app routing set incorrectly (Windows 11) | Change app routing in Sound > App volume settings | 1 min |
| Communication device not working | Not set as communication device | Set separate communication device in Control Panel | 2 mins |
| HDMI audio not working | Graphics driver issue | Update graphics driver (NVIDIA, AMD, Intel) | 10 mins |
Understanding Sample Rates & Bit Depth (For Audiophiles)
If audio quality matters to you (music lovers, professionals), understanding these settings transforms your listening experience.
Sample Rate explained: How many times per second Windows “samples” audio
- 44,100 Hz (CD Quality): Standard for most music streaming (Spotify, Apple Music)
- 48,000 Hz (Studio Quality): Professional video and streaming standard
- 96,000 Hz (High-Res): Premium music services (Tidal HiFi, Qobuz)
- 192,000 Hz (Ultra HD): Maximum quality, requires professional equipment
Bit Depth explained: How much detail is captured in each sample
- 16-bit: Standard (CD quality, YouTube, most streaming)
- 24-bit: Professional (most streaming services’ highest tier)
- 32-bit: Ultra high fidelity (rare, professional studios only)
What to set yours to:
- Casual listening: Leave default (16-bit, 44100 Hz)
- Spotify/YouTube premium: 24-bit, 48000 Hz
- Music professional: 24-bit, 192000 Hz
- Don’t know? Leave it at default—higher isn’t always better
Connecting to External Resources (For Deeper Learning)
To understand more about fixing audio problems comprehensively, explore this detailed guide on solving Windows 10 sound issues, which covers problems from driver conflicts to hardware failures.
For official guidance on Windows audio settings, refer to Microsoft’s official Sound settings documentation, which provides official solutions for most common problems.
For professional audio setup and ASIO driver implementation, consult Steinberg’s ASIO documentation, which explains low-latency professional audio on Windows.
Best Practices for Ongoing Audio Device Management
Weekly Maintenance
- Test all your regularly-used devices to ensure they’re still recognized
- Check that your default device is still the one you intended
- Listen for any audio quality degradation
Monthly Updates
- Check for audio driver updates (especially if you have external USB devices)
- Review your per-app routing to ensure apps are going to intended devices
- Update Bluetooth devices if firmware updates are available
When Troubleshooting
- Always restart the Windows Audio service first (services.msc)
- Update drivers before changing settings
- Document which device works best for which app
- Create a checklist of your device setup for reference
Frequently Asked Questions
Q: Can I have audio playing from two devices simultaneously? A: Not easily through standard Windows settings. However, software like VB-Audio Virtual Audio Cable can create virtual devices for this purpose.
Q: Do I need to restart Windows when changing playback devices? A: No. Changes apply immediately. If they don’t, restart the Windows Audio service instead (faster than restarting Windows).
Q: Is exclusive mode safe to use? A: Yes, for professional audio software. It prevents system sounds from interrupting but doesn’t harm your computer.
Q: Why does my Bluetooth device keep disconnecting as default? A: Windows may have an older default set. Set a wired device as permanent default, then connect Bluetooth only when needed.
Q: What’s the difference between “Default Device” and “Default Communication Device”? A: Default Device handles music and media. Default Communication Device takes priority during calls and voice chats. You can set them to different devices.
Q: Can I rename my playback devices to something meaningful? A: Yes. In Settings > Sound > Device properties, or right-click in Control Panel Sound tab. Renaming helps you identify devices.
Q: Will configuring playback devices improve my internet calling quality? A: Indirectly. Proper device setup ensures your preferred audio input (microphone) and output (speakers/headset) are selected, improving call clarity.
Q: How many playback devices can I have connected at once? A: Technically unlimited, but Windows performs best with 3-5 active devices. Disconnect unused devices to improve performance and reduce confusion.
Summary: Your Action Plan
Right now:
- Identify what playback devices you own (speakers, headset, etc.)
- Choose the method that fits your needs (Quick, Settings, or Control Panel)
- Set your preferred default device using that method
- Test audio playback from multiple apps
This week:
- Configure your communication device separately if you take calls
- Set up per-app routing if using Windows 11 (route Zoom to headset, Spotify to speakers)
- Test all your audio devices to ensure they work properly
- Update your audio drivers if any devices had issues
This month:
- Review your playback configuration monthly to ensure it still matches your needs
- Keep audio drivers updated
- Document which device works best for which task
- Troubleshoot any audio quality issues by adjusting sample rates
Final Thought: Configuring your default playback device might seem technical, but it’s one of the easiest ways to improve your daily computer experience. Better audio during calls means better professionalism. Proper device routing means no more embarrassing audio mishaps. And optimized sample rates mean enjoying media the way creators intended. Take 15 minutes to set this up properly, and you’ll benefit for months.