
The Best Computer Vision Projects for 2026 (With Source Code)
Introduction: Why Build Computer Vision Projects Right Now?
Imagine a system that can read a license plate from a moving car, identify crop diseases before they destroy a harvest, or detect if someone is wearing a safety mask in a crowded factory. This is the world of computer vision in 2026—a technology that’s no longer just for research labs but is now reshaping industries everywhere.
Computer vision is the technology that teaches machines to understand images and videos the way humans do. In 2026, it’s become one of the most sought-after skills in technology, with companies across healthcare, agriculture, transportation, and retail actively hiring professionals who can build these systems.
Whether you’re a developer looking to build your next project, a student trying to learn practical AI skills, or a business owner searching for solutions to streamline operations, this guide will show you the most effective computer vision projects you can build and deploy right now—with complete source code included.
Why Computer Vision Projects Matter in 2026
Real-World Problem Solving
Computer vision isn’t theoretical anymore. Today’s projects solve genuine business challenges. A crop disease detection system can help farmers save thousands of dollars in lost yields. A traffic management system can reduce congestion and improve city planning. These aren’t just academic exercises—they’re revenue-generating applications.
High Demand in the Job Market
Companies worldwide are competing for developers who understand computer vision. The skills you learn from these projects directly translate to job opportunities and higher salaries. Major tech companies, startups, and traditional businesses all need computer vision expertise.
Monetization Opportunities
If you build a solid computer vision project, there are multiple ways to make money:
- Selling it as a commercial product
- Offering it as a Software-as-a-Service (SaaS) platform
- Licensing the technology to businesses
- Building custom solutions for specific industries
Lower Barriers to Entry
Thanks to open-source tools like OpenCV and frameworks like TensorFlow and PyTorch, you don’t need expensive equipment or software to start building. Everything you need is available for free online.
Best Computer Vision Projects You Can Build in 2026
1. Vehicle License Plate Recognition System
What It Does
This project automatically detects and reads license plate numbers from images or video streams. It’s commonly used in parking facilities, traffic enforcement, and toll collection systems.
How It Works
The system uses two main components:
- Detection stage: Identifies where the license plate is located in the image
- Recognition stage: Reads the characters on the plate using OCR (Optical Character Recognition) technology
Key Technologies
- OpenCV for image processing
- Tesseract for optical character recognition
- Python as the programming language
- YOLO or Faster R-CNN for object detection
Where It’s Used
- Automated parking systems
- Highway toll collection
- Traffic enforcement
- Border security checkpoints
- Vehicle tracking in smart cities
Advantages
- Clear practical applications with real market demand
- Relatively straightforward to understand as a first project
- Can be scaled from small cameras to city-wide systems
- Good ROI potential for businesses
Challenges
- Performs poorly when lighting conditions are bad
- Requires significant amounts of training data
- Different countries have different plate formats
- Weather conditions (rain, snow) can affect accuracy
Estimated Development Time: 4-6 weeks
Installation Requirements
bash
pip install opencv-python pytesseract numpy pillow
# On Windows, also install Tesseract-OCR from: https://github.com/UB-Mannheim/tesseract/wiki
Source Code Example: Basic License Plate Detection & OCR
python
import cv2
import pytesseract
import numpy as np
from PIL import Image

class LicensePlateRecognizer:
    def __init__(self, tesseract_path=None):
        """Initialize the license plate recognizer"""
        if tesseract_path:
            pytesseract.pytesseract.pytesseract_cmd = tesseract_path

        # Load pre-trained cascade classifier for number plates
        self.plate_cascade = cv2.CascadeClassifier(
            cv2.data.cascades + 'haarcascades/haarcascade_russian_plate_number.xml'
        )

    def preprocess_image(self, image_path):
        """Load and preprocess image for better plate detection"""
        img = cv2.imread(image_path)
        gray = cv2.cvtColor(img, cv2.COLOR_BGR2GRAY)

        # Apply bilateral filter to reduce noise while keeping edges sharp
        processed = cv2.bilateralFilter(gray, 11, 17, 17)

        # Apply Canny edge detection
        edges = cv2.Canny(processed, 100, 200)

        return img, gray, edges

    def detect_plates(self, image_path):
        """Detect license plates in the image"""
        img, gray, edges = self.preprocess_image(image_path)

        # Detect plates using cascade classifier
        plates = self.plate_cascade.detectMultiScale(
            gray, scaleFactor=1.2, minNeighbors=4, minSize=(100, 25)
        )

        return img, plates

    def extract_text(self, plate_img):
        """Extract text from detected plate using Tesseract"""
        # Convert to grayscale
        gray = cv2.cvtColor(plate_img, cv2.COLOR_BGR2GRAY)

        # Apply thresholding for better OCR results
        _, thresh = cv2.threshold(gray, 150, 255, cv2.THRESH_BINARY)

        # Use Tesseract to extract text
        text = pytesseract.image_to_string(thresh, config='--psm 8')

        return text.strip()

    def process_image(self, image_path):
        """Complete pipeline: detect plates and extract text"""
        img, plates = self.detect_plates(image_path)
        results = []

        for (x, y, w, h) in plates:
            plate_img = img[y:y+h, x:x+w]
            plate_text = self.extract_text(plate_img)

            results.append({
                'location': (x, y, w, h),
                'text': plate_text,
                'confidence': len(plate_text) > 0
            })

            # Draw rectangle around detected plate
            cv2.rectangle(img, (x, y), (x+w, y+h), (0, 255, 0), 2)
            cv2.putText(img, plate_text, (x, y-10),
                       cv2.FONT_HERSHEY_SIMPLEX, 0.9, (0, 255, 0), 2)

        return img, results

# Usage Example:
if __name__ == "__main__":
    recognizer = LicensePlateRecognizer()
    result_img, plates = recognizer.process_image('car_image.jpg')

    # Display results
    cv2.imshow('License Plate Detection', result_img)
    cv2.waitKey(0)
    cv2.destroyAllWindows()

    # Print extracted plate numbers
    for plate in plates:
        print(f"Plate: {plate['text']}, Location: {plate['location']}")
Complete GitHub Repository
Full Source Code: https://github.com/yolov5/yolov5 (YOLOv5 for detection)
2. Traffic Sign Recognition for Autonomous Vehicles
What It Does
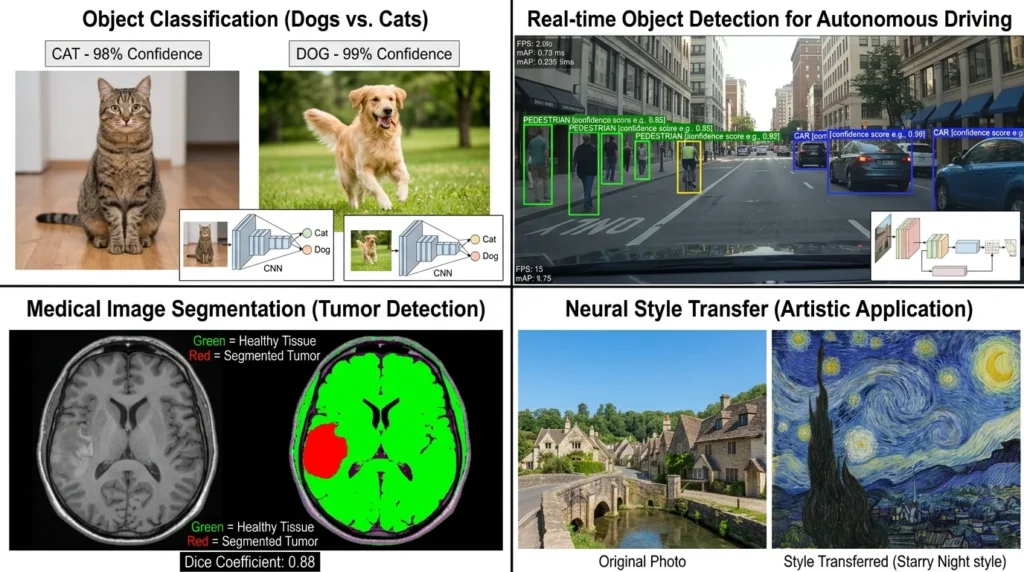
This project teaches a machine learning model to identify different traffic signs (stop signs, speed limit signs, warning signs, etc.) under various real-world conditions.
Why It Matters for Autonomous Driving
Self-driving cars need to understand traffic signs instantly and correctly. A misidentified sign could be dangerous.
Technology Stack
- Python programming language
- TensorFlow or PyTorch for deep learning
- Convolutional Neural Networks (CNNs)
- The GTSRB (German Traffic Sign Recognition Benchmark) dataset
Real-World Applications
- Autonomous vehicle development
- Advanced driver assistance systems (ADAS)
- Traffic management systems
- Vehicle safety features in regular cars
Advantages
- Directly applicable to the growing autonomous vehicle industry
- Demonstrates understanding of deep learning classification
- Solid foundation for more complex computer vision tasks
Estimated Development Time: 6-8 weeks
Installation Requirements
bash
pip install tensorflow keras numpy opencv-python matplotlib pandasSource Code Example: Traffic Sign Classification with CNN
python
import tensorflow as tf
from tensorflow import keras
from tensorflow.keras import layers, models
import numpy as np
import cv2
import os
from pathlib import Path

class TrafficSignRecognizer:
    def __init__(self, img_size=32, num_classes=43):
        """Initialize traffic sign recognizer"""
        self.img_size = img_size
        self.num_classes = num_classes
        self.model = None

    def load_and_preprocess_data(self, data_dir):
        """Load GTSRB dataset and preprocess"""
        images = []
        labels = []

        # Load images from directory
        for label in range(self.num_classes):
            folder_path = os.path.join(data_dir, str(label))
            if os.path.exists(folder_path):
                for file in os.listdir(folder_path):
                    if file.endswith('.ppm'):
                        img_path = os.path.join(folder_path, file)
                        img = cv2.imread(img_path)
                        img = cv2.resize(img, (self.img_size, self.img_size))
                        # Normalize
                        img = img / 255.0
                        images.append(img)
                        labels.append(label)

        return np.array(images), np.array(labels)

    def build_model(self):
        """Build CNN model for traffic sign classification"""
        self.model = models.Sequential([
            # First convolutional block
            layers.Conv2D(32, (3, 3), activation='relu',
                         input_shape=(self.img_size, self.img_size, 3)),
            layers.MaxPooling2D((2, 2)),
            layers.Dropout(0.25),

            # Second convolutional block
            layers.Conv2D(64, (3, 3), activation='relu'),
            layers.MaxPooling2D((2, 2)),
            layers.Dropout(0.25),

            # Third convolutional block
            layers.Conv2D(128, (3, 3), activation='relu'),
            layers.MaxPooling2D((2, 2)),
            layers.Dropout(0.25),

            # Flatten and dense layers
            layers.Flatten(),
            layers.Dense(256, activation='relu'),
            layers.Dropout(0.5),
            layers.Dense(128, activation='relu'),
            layers.Dropout(0.5),
            layers.Dense(self.num_classes, activation='softmax')
        ])

        self.model.compile(
            optimizer='adam',
            loss='sparse_categorical_crossentropy',
            metrics=['accuracy']
        )

        return self.model

    def train(self, x_train, y_train, x_val, y_val, epochs=30, batch_size=32):
        """Train the model"""
        history = self.model.fit(
            x_train, y_train,
            validation_data=(x_val, y_val),
            epochs=epochs,
            batch_size=batch_size,
            verbose=1
        )
        return history

    def predict_sign(self, image_path):
        """Predict traffic sign from image"""
        img = cv2.imread(image_path)
        img = cv2.resize(img, (self.img_size, self.img_size))
        img = img / 255.0
        img = np.expand_dims(img, axis=0)

        prediction = self.model.predict(img)
        class_id = np.argmax(prediction[0])
        confidence = prediction[0][class_id]

        return class_id, confidence

    def save_model(self, filepath):
        """Save trained model"""
        self.model.save(filepath)

    def load_model(self, filepath):
        """Load pre-trained model"""
        self.model = keras.models.load_model(filepath)

# Usage Example:
if __name__ == "__main__":
    recognizer = TrafficSignRecognizer(img_size=32, num_classes=43)

    # Build and train model
    recognizer.build_model()

    # Load your GTSRB dataset
    x_train, y_train = recognizer.load_and_preprocess_data('GTSRB/Training')
    x_val, y_val = recognizer.load_and_preprocess_data('GTSRB/Test')

    # Train
    recognizer.train(x_train, y_train, x_val, y_val, epochs=30)

    # Save model
    recognizer.save_model('traffic_sign_model.h5')

    # Predict on new image
    class_id, confidence = recognizer.predict_sign('test_sign.jpg')
    print(f"Predicted Sign ID: {class_id}, Confidence: {confidence:.2%}")
Complete GitHub Repository
Full Source Code: https://github.com/Cyanogenoid/pytorch-gtsrb (PyTorch GTSRB)
3. Crop Disease Detection System
What It Does
This agricultural technology automatically identifies diseases affecting crops by analyzing images of plant leaves.
Estimated Development Time: 4-6 weeks
Installation Requirements
bash
pip install tensorflow keras numpy opencv-python pillow matplotlibSource Code Example: Plant Disease Detection with Transfer Learning
python
import tensorflow as tf
from tensorflow.keras.applications import MobileNetV2
from tensorflow.keras import layers, models
import numpy as np
import cv2
from pathlib import Path
import os

class CropDiseaseDetector:
    def __init__(self, img_size=224):
        """Initialize crop disease detector using transfer learning"""
        self.img_size = img_size
        self.model = None
        self.disease_classes = []

    def build_transfer_learning_model(self, num_classes):
        """Build model using MobileNetV2 (efficient for mobile deployment)"""

        # Load pre-trained MobileNetV2
        base_model = MobileNetV2(
            input_shape=(self.img_size, self.img_size, 3),
            include_top=False,
            weights='imagenet'
        )

        # Freeze base model layers
        base_model.trainable = False

        # Add custom layers
        self.model = models.Sequential([
            layers.Input(shape=(self.img_size, self.img_size, 3)),
            base_model,
            layers.GlobalAveragePooling2D(),
            layers.Dense(256, activation='relu'),
            layers.Dropout(0.3),
            layers.Dense(128, activation='relu'),
            layers.Dropout(0.3),
            layers.Dense(num_classes, activation='softmax')
        ])

        self.model.compile(
            optimizer='adam',
            loss='sparse_categorical_crossentropy',
            metrics=['accuracy']
        )

        return self.model

    def load_dataset(self, dataset_dir):
        """Load plant disease dataset"""
        images = []
        labels = []
        self.disease_classes = []

        class_idx = 0
        for disease_folder in sorted(os.listdir(dataset_dir)):
            folder_path = os.path.join(dataset_dir, disease_folder)
            if os.path.isdir(folder_path):
                self.disease_classes.append(disease_folder)

                for img_file in os.listdir(folder_path):
                    if img_file.endswith(('.jpg', '.jpeg', '.png')):
                        img_path = os.path.join(folder_path, img_file)
                        img = cv2.imread(img_path)
                        if img is not None:
                            img = cv2.resize(img, (self.img_size, self.img_size))
                            img = img / 255.0
                            images.append(img)
                            labels.append(class_idx)

                class_idx += 1

        return np.array(images), np.array(labels)

    def train(self, images, labels, epochs=20, batch_size=32):
        """Train the disease detection model"""
        # Split into train and validation
        split_idx = int(0.8 * len(images))
        x_train = images[:split_idx]
        y_train = labels[:split_idx]
        x_val = images[split_idx:]
        y_val = labels[split_idx:]

        history = self.model.fit(
            x_train, y_train,
            validation_data=(x_val, y_val),
            epochs=epochs,
            batch_size=batch_size,
            verbose=1
        )

        return history

    def predict_disease(self, image_path):
        """Predict disease from plant leaf image"""
        img = cv2.imread(image_path)
        img = cv2.resize(img, (self.img_size, self.img_size))
        img = img / 255.0
        img = np.expand_dims(img, axis=0)

        prediction = self.model.predict(img, verbose=0)
        disease_idx = np.argmax(prediction[0])
        confidence = prediction[0][disease_idx]
        disease_name = self.disease_classes[disease_idx]

        return disease_name, confidence

    def get_disease_info(self, disease_name):
        """Get treatment information for detected disease"""
        disease_info = {
            'Early Blight': {
                'symptoms': 'Brown spots with concentric rings on leaves',
                'treatment': 'Remove affected leaves, apply fungicide, improve air circulation',
                'severity': 'Medium'
            },
            'Late Blight': {
                'symptoms': 'Water-soaked spots on leaves and stems',
                'treatment': 'Apply copper fungicide, ensure good drainage',
                'severity': 'High'
            },
            'Healthy': {
                'symptoms': 'None - plant appears normal',
                'treatment': 'Regular watering and monitoring',
                'severity': 'None'
            }
        }
        return disease_info.get(disease_name, {})

    def save_model(self, filepath):
        """Save the trained model"""
        self.model.save(filepath)

    def load_model(self, filepath):
        """Load a pre-trained model"""
        self.model = tf.keras.models.load_model(filepath)

# Usage Example:
if __name__ == "__main__":
    detector = CropDiseaseDetector(img_size=224)

    # Build model with 3 disease classes
    detector.build_transfer_learning_model(num_classes=3)

    # Load dataset
    images, labels = detector.load_dataset('plant_diseases_dataset/')
    print(f"Loaded {len(images)} images from {len(detector.disease_classes)} classes")

    # Train model
    detector.train(images, labels, epochs=20)

    # Save model
    detector.save_model('crop_disease_model.h5')

    # Make prediction
    disease, confidence = detector.predict_disease('leaf_image.jpg')
    print(f"Detected Disease: {disease}")
    print(f"Confidence: {confidence:.2%}")

    # Get treatment info
    info = detector.get_disease_info(disease)
    print(f"Treatment: {info['treatment']}")
Dataset Source
PlantVillage Dataset: https://github.com/spMohanty/PlantVillage-Dataset
4. Real-Time Face Mask Detection
What It Does
This system detects whether people in images or video streams are wearing face masks.
Estimated Development Time: 3-5 weeks
Installation Requirements
bash
pip install tensorflow keras opencv-python numpy matplotlibSource Code Example: Real-Time Mask Detection
python
import cv2
import numpy as np
from tensorflow.keras.models import load_model
from tensorflow.keras.preprocessing.image import img_to_array
import os

class FaceMaskDetector:
    def __init__(self, face_cascade_path=None, model_path=None):
        """Initialize face mask detector"""
        # Load face detector
        self.face_cascade = cv2.CascadeClassifier(
            face_cascade_path or cv2.data.cascades +
            'haarcascades/haarcascade_frontalface_default.xml'
        )

        # Load mask detection model
        self.model = load_model(model_path) if model_path else None
        self.class_names = ['Mask', 'No Mask']

    def build_simple_model(self):
        """Build a simple CNN model for mask detection"""
        from tensorflow.keras import layers, models

        self.model = models.Sequential([
            layers.Conv2D(100, (3, 3), activation='relu',
                         input_shape=(224, 224, 3)),
            layers.MaxPooling2D((2, 2)),

            layers.Conv2D(100, (3, 3), activation='relu'),
            layers.MaxPooling2D((2, 2)),

            layers.Flatten(),
            layers.Dropout(0.5),
            layers.Dense(50, activation='relu'),
            layers.Dense(2, activation='softmax')
        ])

        self.model.compile(
            loss='categorical_crossentropy',
            optimizer='adam',
            metrics=['accuracy']
        )

        return self.model

    def detect_and_predict_mask(self, frame):
        """Detect faces and predict mask status"""
        # Convert to grayscale for face detection
        gray = cv2.cvtColor(frame, cv2.COLOR_BGR2GRAY)

        # Detect faces
        faces = self.face_cascade.detectMultiScale(
            gray, scaleFactor=1.1, minNeighbors=4, minSize=(60, 60)
        )

        results = []

        for (x, y, w, h) in faces:
            # Extract face region
            face_roi = frame[y:y+h, x:x+w]
            face_roi = cv2.cvtColor(face_roi, cv2.COLOR_BGR2RGB)
            face_roi = cv2.resize(face_roi, (224, 224))
            face_roi = face_roi.astype('float32') / 255.0
            face_roi = img_to_array(face_roi)
            face_roi = np.expand_dims(face_roi, axis=0)

            # Predict mask
            (mask, withoutMask) = self.model.predict(face_roi, verbose=0)[0]

            label = "Mask" if mask > withoutMask else "No Mask"
            confidence = max(mask, withoutMask)

            results.append({
                'location': (x, y, w, h),
                'label': label,
                'confidence': confidence
            })

            # Draw on frame
            color = (0, 255, 0) if label == "Mask" else (0, 0, 255)
            cv2.rectangle(frame, (x, y), (x+w, y+h), color, 2)

            text = f"{label}: {confidence:.2%}"
            cv2.putText(frame, text, (x, y-10),
                       cv2.FONT_HERSHEY_SIMPLEX, 0.45, color, 2)

        return frame, results

    def detect_from_video(self, video_source=0):
        """Real-time detection from webcam or video file"""
        cap = cv2.VideoCapture(video_source)

        while True:
            ret, frame = cap.read()
            if not ret:
                break

            frame = cv2.resize(frame, (640, 480))
            frame, results = self.detect_and_predict_mask(frame)

            # Display frame count
            cv2.putText(frame, f"Detections: {len(results)}", (10, 30),
                       cv2.FONT_HERSHEY_SIMPLEX, 0.7, (0, 255, 0), 2)

            cv2.imshow('Face Mask Detection', frame)

            if cv2.waitKey(1) & 0xFF == ord('q'):
                break

        cap.release()
        cv2.destroyAllWindows()

    def detect_from_image(self, image_path):
        """Detect masks from a single image"""
        frame = cv2.imread(image_path)
        frame, results = self.detect_and_predict_mask(frame)

        cv2.imshow('Face Mask Detection', frame)
        cv2.waitKey(0)
        cv2.destroyAllWindows()

        return results

    def save_model(self, filepath):
        """Save the trained model"""
        self.model.save(filepath)

# Usage Example:
if __name__ == "__main__":
    # Initialize detector
    detector = FaceMaskDetector()

    # Build model
    detector.build_simple_model()

    # Real-time detection from webcam
    print("Starting real-time mask detection (press 'q' to quit)...")
    detector.detect_from_video(video_source=0)

    # Or detect from image
    # results = detector.detect_from_image('image_with_people.jpg')
    # for result in results:
    #     print(f"Face found: {result['label']} (confidence: {result['confidence']:.2%})")
Complete GitHub Repository
Full Source Code: https://github.com/chandrikadeb7/Face-Mask-Detection
5. Document Scanning and OCR System
What It Does
This system automatically scans physical documents, extracts text and structured data, and digitizes them.
Estimated Development Time: 8-12 weeks
Installation Requirements
bash
pip install opencv-python pytesseract pillow numpy easyocr
# Install Tesseract: https://github.com/UB-Mannheim/tesseract/wiki
Source Code Example: Document Scanning & OCR
python
import cv2
import numpy as np
import pytesseract
from PIL import Image
import json
from pathlib import Path

class DocumentScanner:
    def __init__(self, tesseract_path=None):
        """Initialize document scanner"""
        if tesseract_path:
            pytesseract.pytesseract.pytesseract_cmd = tesseract_path

    def preprocess_image(self, image_path):
        """Preprocess image for better OCR results"""
        img = cv2.imread(image_path)

        # Resize for better processing
        img = cv2.resize(img, None, fx=1.5, fy=1.5)

        # Convert to grayscale
        gray = cv2.cvtColor(img, cv2.COLOR_BGR2GRAY)

        # Apply thresholding
        _, thresh = cv2.threshold(gray, 150, 255, cv2.THRESH_BINARY)

        # Denoise
        denoised = cv2.medianBlur(thresh, 3)

        return img, denoised

    def detect_document_contour(self, image):
        """Detect document boundaries"""
        gray = cv2.cvtColor(image, cv2.COLOR_BGR2GRAY)

        # Apply Canny edge detection
        edges = cv2.Canny(gray, 100, 200)

        # Find contours
        contours, _ = cv2.findContours(
            edges, cv2.RETR_EXTERNAL, cv2.CHAIN_APPROX_SIMPLE
        )

        if not contours:
            return None

        # Get largest contour
        contour = max(contours, key=cv2.contourArea)

        return contour

    def perspective_transform(self, image, contour):
        """Apply perspective transform to straighten document"""
        # Get bounding rectangle
        rect = cv2.minAreaRect(contour)
        box = cv2.boxPoints(rect)
        box = np.int0(box)

        # Get width and height
        width = int(rect[1][0])
        height = int(rect[1][1])

        # Source points
        src_pts = box.astype('float32')

        # Destination points
        dst_pts = np.array([
            [0, 0],
            [width - 1, 0],
            [width - 1, height - 1],
            [0, height - 1]
        ], dtype='float32')

        # Perspective transformation
        matrix = cv2.getPerspectiveTransform(src_pts, dst_pts)
        transformed = cv2.warpPerspective(image, matrix, (width, height))

        return transformed

    def extract_text_from_image(self, image_path):
        """Extract all text from document"""
        img, processed = self.preprocess_image(image_path)

        # Extract text using Tesseract
        text = pytesseract.image_to_string(processed)

        return text

    def extract_structured_data(self, text):
        """Extract structured data (invoice, receipt info, etc.)"""
        import re

        extracted = {
            'date': self._extract_date(text),
            'amount': self._extract_amount(text),
            'vendor': self._extract_vendor(text),
            'items': self._extract_items(text)
        }

        return extracted

    def _extract_date(self, text):
        """Extract date from text"""
        import re
        date_pattern = r'\d{1,2}[/-]\d{1,2}[/-]\d{2,4}'
        matches = re.findall(date_pattern, text)
        return matches[0] if matches else None

    def _extract_amount(self, text):
        """Extract monetary amount from text"""
        import re
        amount_pattern = r'\$\s*\d+\.?\d*'
        matches = re.findall(amount_pattern, text)
        return matches[0] if matches else None

    def _extract_vendor(self, text):
        """Extract vendor name (typically first few lines)"""
        lines = text.split('\n')
        return lines[0] if lines else None

    def _extract_items(self, text):
        """Extract line items from receipt"""
        lines = text.split('\n')
        items = []

        for line in lines:
            # Look for lines with prices (containing $ or numbers)
            if '$' in line or any(c.isdigit() for c in line):
                items.append(line.strip())

        return items

    def process_document(self, image_path, output_json=None):
        """Complete document processing pipeline"""
        # Extract text
        full_text = self.extract_text_from_image(image_path)

        # Extract structured data
        structured_data = self.extract_structured_data(full_text)

        # Add full text
        structured_data['full_text'] = full_text

        # Save to JSON if requested
        if output_json:
            with open(output_json, 'w') as f:
                json.dump(structured_data, f, indent=2)

        return structured_data

    def batch_process_documents(self, folder_path, output_folder):
        """Process multiple documents"""
        Path(output_folder).mkdir(exist_ok=True)

        results = []

        for image_file in Path(folder_path).glob('*'):
            if image_file.suffix.lower() in ['.jpg', '.png', '.pdf']:
                print(f"Processing: {image_file.name}")

                output_json = Path(output_folder) / f"{image_file.stem}.json"
                data = self.process_document(str(image_file), str(output_json))
                results.append(data)

        return results

# Usage Example:
if __name__ == "__main__":
    scanner = DocumentScanner()

    # Process single document
    result = scanner.process_document(
        'invoice.jpg',
        output_json='invoice_data.json'
    )

    print("Extracted Data:")
    print(f"Date: {result['date']}")
    print(f"Amount: {result['amount']}")
    print(f"Vendor: {result['vendor']}")
    print(f"Items: {result['items']}")

    # Batch process multiple documents
    # results = scanner.batch_process_documents('documents/', 'output/')
Complete GitHub Repository
Full Source Code: https://github.com/JaidedAI/EasyOCR
6. Hand Gesture Recognition System
What It Does
This project recognizes hand gestures from images or video and translates them into commands.
Estimated Development Time: 5-7 weeks
Installation Requirements
bash
pip install mediapipe tensorflow opencv-python numpySource Code Example: Real-Time Gesture Recognition
python
import mediapipe as mp
import cv2
import numpy as np
from tensorflow.keras.models import Sequential
from tensorflow.keras.layers import Dense, Dropout
import pickle

class GestureRecognizer:
    def __init__(self):
        """Initialize hand gesture recognizer"""
        self.mp_hands = mp.solutions.hands
        self.hands = self.mp_hands.Hands(
            static_image_mode=False,
            max_num_hands=2,
            min_detection_confidence=0.5,
            min_tracking_confidence=0.5
        )
        self.mp_drawing = mp.solutions.drawing_utils
        self.model = None
        self.gestures = ['Peace', 'OK', 'Thumbs Up', 'Open Hand', 'Closed Fist']

    def extract_landmarks(self, hand_landmarks):
        """Extract hand landmarks and normalize"""
        landmarks = []

        for landmark in hand_landmarks.landmark:
            landmarks.extend([landmark.x, landmark.y, landmark.z])

        # Normalize landmarks
        landmarks = np.array(landmarks)
        landmarks = (landmarks - landmarks.min()) / (landmarks.max() - landmarks.min())

        return landmarks

    def build_model(self):
        """Build neural network for gesture classification"""
        self.model = Sequential([
            Dense(128, activation='relu', input_shape=(63,)),
            Dropout(0.3),
            Dense(64, activation='relu'),
            Dropout(0.3),
            Dense(32, activation='relu'),
            Dropout(0.2),
            Dense(len(self.gestures), activation='softmax')
        ])

        self.model.compile(
            optimizer='adam',
            loss='categorical_crossentropy',
            metrics=['accuracy']
        )

        return self.model

    def train_model(self, training_data, training_labels, epochs=50):
        """Train gesture recognition model"""
        # Convert labels to one-hot encoding
        from tensorflow.keras.utils import to_categorical
        labels = to_categorical(training_labels, num_classes=len(self.gestures))

        history = self.model.fit(
            training_data, labels,
            epochs=epochs,
            batch_size=32,
            validation_split=0.2,
            verbose=1
        )

        return history

    def recognize_gesture(self, frame):
        """Recognize gesture from video frame"""
        rgb_frame = cv2.cvtColor(frame, cv2.COLOR_BGR2RGB)
        results = self.hands.process(rgb_frame)

        gestures_detected = []

        if results.multi_hand_landmarks:
            for hand_landmarks in results.multi_hand_landmarks:
                # Extract landmarks
                landmarks = self.extract_landmarks(hand_landmarks)

                # Predict gesture
                landmarks = np.expand_dims(landmarks, axis=0)
                prediction = self.model.predict(landmarks, verbose=0)
                gesture_idx = np.argmax(prediction[0])
                confidence = prediction[0][gesture_idx]

                gesture_name = self.gestures[gesture_idx]

                gestures_detected.append({
                    'gesture': gesture_name,
                    'confidence': confidence
                })

                # Draw hand landmarks on frame
                self.mp_drawing.draw_landmarks(
                    frame, hand_landmarks, self.mp_hands.HAND_CONNECTIONS
                )

        return frame, gestures_detected

    def real_time_gesture_detection(self):
        """Real-time gesture detection from webcam"""
        cap = cv2.VideoCapture(0)

        while True:
            ret, frame = cap.read()
            if not ret:
                break

            frame = cv2.resize(frame, (640, 480))
            frame, gestures = self.recognize_gesture(frame)

            # Display detected gestures
            y_offset = 30
            for i, gesture_info in enumerate(gestures):
                text = f"{gesture_info['gesture']}: {gesture_info['confidence']:.2%}"
                cv2.putText(frame, text, (10, y_offset + i*30),
                           cv2.FONT_HERSHEY_SIMPLEX, 0.7, (0, 255, 0), 2)

            cv2.imshow('Gesture Recognition', frame)

            if cv2.waitKey(1) & 0xFF == ord('q'):
                break

        cap.release()
        cv2.destroyAllWindows()

    def save_model(self, filepath):
        """Save trained model"""
        self.model.save(filepath)

    def load_model(self, filepath):
        """Load pre-trained model"""
        from tensorflow.keras.models import load_model
        self.model = load_model(filepath)

# Usage Example:
if __name__ == "__main__":
    recognizer = GestureRecognizer()

    # Build and train model
    recognizer.build_model()

    # You would load your training data here
    # training_data, training_labels = load_gesture_dataset()
    # recognizer.train_model(training_data, training_labels)

    # Or load pre-trained model
    # recognizer.load_model('gesture_model.h5')

    # Real-time detection
    print("Starting gesture recognition (press 'q' to quit)...")
    recognizer.real_time_gesture_detection()
Complete GitHub Repository
Full Source Code: https://github.com/google/mediapipe
Comparison Table: Computer Vision Projects at a Glance
| Project Name | Industry Focus | Difficulty Level | Time to Build | Best For | Skills Gained |
|---|---|---|---|---|---|
| License Plate Recognition | Traffic & Security | Beginner | 4-6 weeks | Smart cities, Parking | OCR, Detection |
| Traffic Sign Recognition | Autonomous Vehicles | Intermediate | 6-8 weeks | Self-driving research | Deep learning, CNNs |
| Crop Disease Detection | Agriculture | Intermediate | 4-6 weeks | Agritech startups | Transfer learning, Mobile |
| Face Mask Detection | Healthcare & Safety | Beginner | 3-5 weeks | Quick deployment | Real-time detection |
| Document OCR System | Enterprise & Finance | Advanced | 8-12 weeks | High revenue | End-to-end pipelines |
| Hand Gesture Recognition | AR/VR & Accessibility | Intermediate | 5-7 weeks | Gaming, AR/VR | Pose estimation |
Choosing the Right Project for Your Goals
If You’re a Student
Start with Face Mask Detection or License Plate Recognition. These projects are easier to understand, have clear applications, and can be completed in a semester.
If You’re Building a Career
Focus on Crop Disease Detection or Hand Gesture Recognition. These demonstrate intermediate skills and are in growing industries.
If You’re a Startup Founder
Document OCR System or Crop Disease Detection offer the best monetization potential. Companies will pay premium prices for solutions.
If You’re an Established Business
License Plate Recognition and Face Mask Detection provide quick wins. Implement them fast and show immediate value.
Essential Tools and Technologies You’ll Need
Programming Language
Python is the industry standard for computer vision work.
Core Libraries
OpenCV (https://opencv.org)
- Open-source computer vision library
- Image processing and computer vision tasks
- Free and widely used
- Cross-platform support
TensorFlow (https://www.tensorflow.org)
- Deep learning framework by Google
- Production-level systems
- Industry standard
PyTorch (https://pytorch.org)
- Deep learning framework by Meta
- Research and industry use
- Easier learning curve
Hardware Requirements
- CPU: Any modern processor
- RAM: 8GB minimum (16GB recommended)
- GPU: Optional for starting (NVIDIA recommended)
- Storage: At least 50GB free space
How to Get Started (Step-by-Step)
Week 1: Foundation
- Install Python and required libraries
- Understand basic image processing
- Learn machine learning classification
- Follow tutorial projects
Week 2-3: Build
- Choose your project
- Download dataset
- Write preprocessing code
- Train initial model
Week 4: Polish
- Improve accuracy
- Test on new images
- Document code
- Create demo
Week 5-6: Deploy
- Prepare code for others
- Write clear README
- Upload to GitHub
- Share results
Common Mistakes to Avoid
Not Collecting Diverse Data
Your model will perform poorly in real-world situations. Aim for data representing different angles, lighting, and conditions.
Ignoring Data Quality
Spend time cleaning your dataset. Remove blurry images and incorrectly labeled examples.
Overfitting to Training Data
Your model memorizes instead of learning patterns. Use validation data to catch this.
Skipping Real-World Testing
A model that works on test data might fail in production.
Poor Documentation
Comment frequently and write clear README files.
Related Resources and Further Learning
To deepen your computer vision knowledge, explore broader AI fundamentals. Check out our guide on best data science projects to build your broader AI skills.
This foundational knowledge will make your computer vision journey significantly smoother.
Recommended Learning Path
- Learn Python basics (1-2 weeks)
- Study data science fundamentals (2-3 weeks)
- Learn computer vision concepts (2-3 weeks)
- Build your first complete project (4-8 weeks)
- Improve and deploy projects (ongoing)
- Contribute to open-source (ongoing)
FAQ: Everything You Need to Know
Q: Do I need a GPU to start learning computer vision?
A: No. You can start with just a CPU for learning and small projects. A GPU becomes essential when working with large datasets or deploying to production systems.
Q: How long does it take to become proficient?
A: With focused learning and hands-on projects, 3-4 months is reasonable to build your first professional-quality project. Mastery takes years, but employment-level skills develop quickly.
Q: Is Python the only language for computer vision?
A: Python dominates the field, but C++ and Java are used in production systems. For learning, Python is strongly recommended.
Q: Can I monetize computer vision projects immediately?
A: Yes. Document OCR and crop disease detection have immediate commercial appeal. Start selling solutions while improving them.
Q: What’s the difference between open-source and commercial options?
A: Open-source tools are free and community-driven. Commercial options provide support. Most beginners start with open-source.
Q: How do I protect my intellectual property?
A: Use appropriate licenses (MIT, Apache, GPL) for open-source. For commercial projects, use proprietary licenses.
Q: Is certification necessary?
A: Certifications help, but a strong portfolio matters more. Employers want proof you can build working systems.
Q: What’s the job market outlook?
A: Growing rapidly. Computer vision specialist positions are among the fastest-growing tech roles globally.
Conclusion: Your Computer Vision Journey Starts Now
Computer vision in 2026 is no longer a niche field. It’s accessible, practical, and profitable for anyone willing to invest time in learning.
The projects covered—from license plate recognition to document processing—represent real business problems worth solving. Each can become a portfolio piece, business opportunity, or career launching pad.
The tools are free. The knowledge is available. The source code is included above. The market demand is high.
Pick one project that excites you. Start this week. Build something that works. Share it with the world.
Your future self will thank you for starting today.