
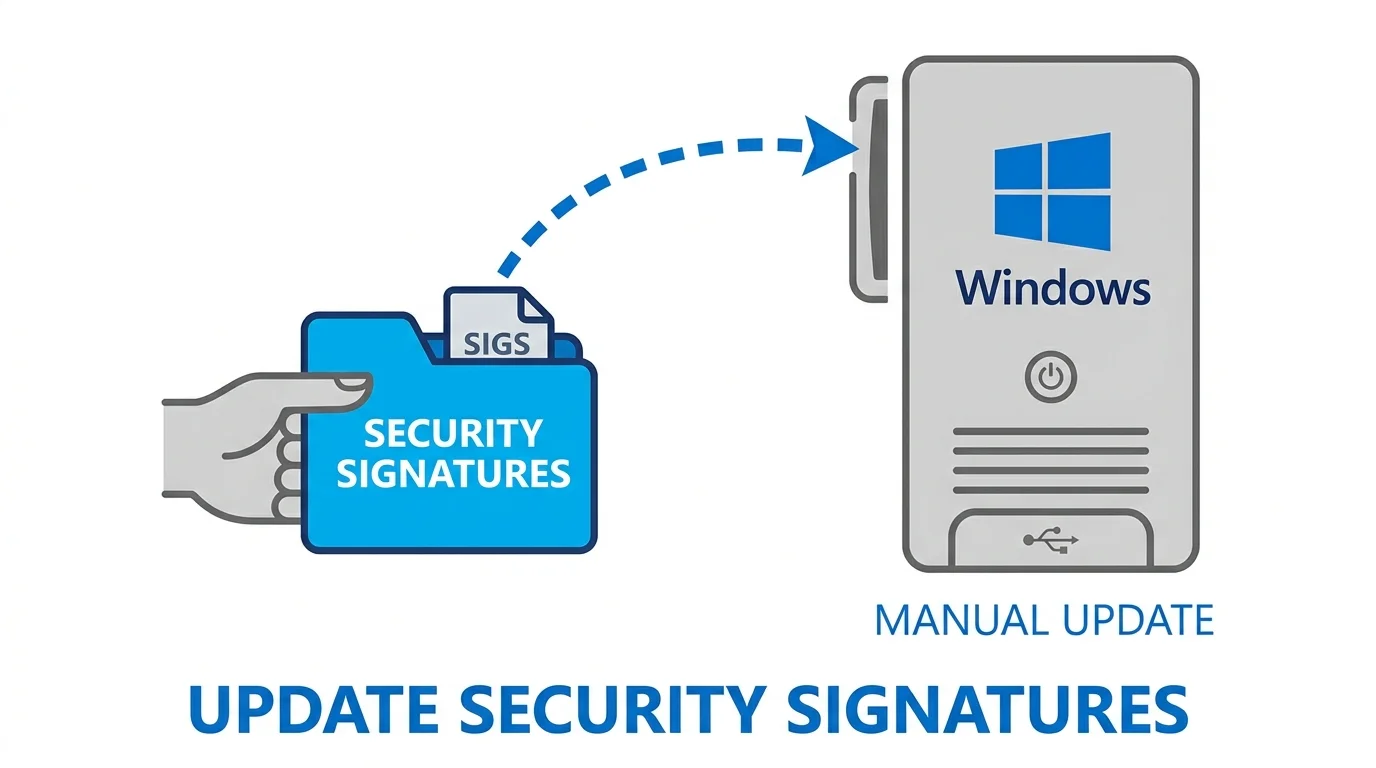
Your computer’s protection system works like a security guard with a list of known criminals. That “list” is called security signatures, or antimalware definitions. Microsoft Defender Antivirus maintains this list and updates it constantly—sometimes multiple times per day—to catch emerging threats.
Normally, these updates happen silently in the background. You don’t notice them because Windows handles everything automatically. But sometimes you need to take control:
- Your internet connection is unreliable or offline
- Network policies block automatic updates
- You suspect your PC has been infected and need immediate protection
- You manage a group of computers and want precise update timing
- Automatic updates failed and you need a workaround
The core principle: Keeping security signatures current is one of the simplest ways to stay protected. Old definitions mean your antivirus can’t recognize new threats—like keeping a criminal database from 2020 when it’s now 2026.
So in this guide, we will understand how to update Windows Security Signatures Manually (Windows 10/11)
Which Windows Versions Support Manual Signature Updates?
Manual signature updating works on:
- Windows 10 (version 1607 and all later versions including 22H2)
- Windows 11 (version 21H2 and later)
- Windows Defender Antivirus (built into Windows Security)
Both operating systems use the same core update systems. If you’re running a current Windows version, the methods in this guide on How to Update Windows Security Signatures Manually (Windows 10/11) apply to you.
Not sure which version you have? Press Windows + R, type winver, and press Enter. Look for “Edition” (Windows 10/11) and “OS Build” to confirm your version.
Before You Start: Check Your Current Protection Status
Before updating anything, let’s see what you’re currently running.
Method 1: Quick Check in Windows Security (Visual)
- Click the Windows Start button
- Type “Windows Security” and open it
- Navigate to Virus & threat protection (left sidebar)
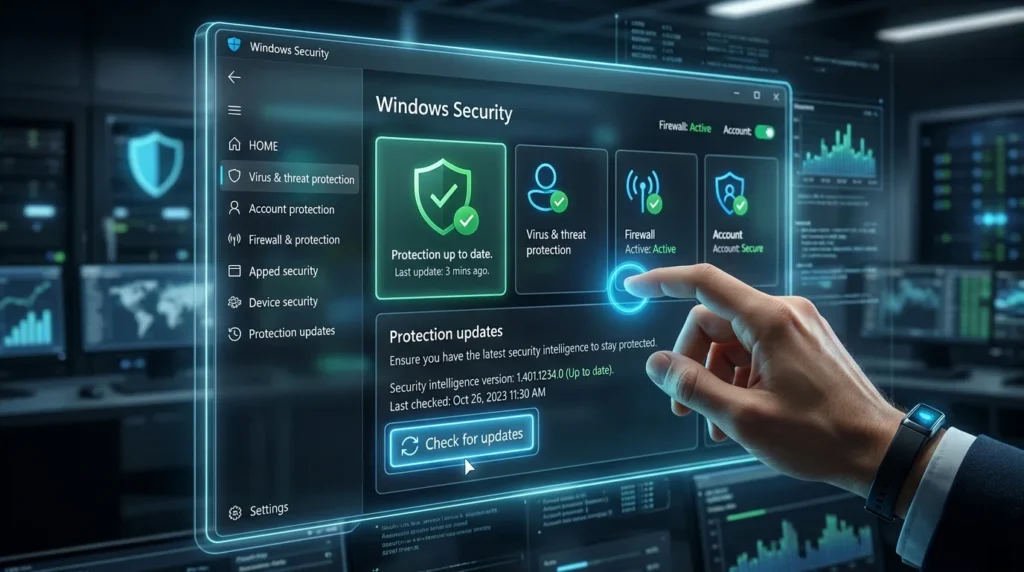
- Look at the section titled Virus & threat protection updates
- Note the Last update timestamp
This shows you:
- When your last update occurred
- Current protection engine version
- Any alerts or issues needing attention
Method 2: PowerShell Check (Technical, Precise)
For more detailed information (useful if you manage multiple PCs):
- Right-click Start menu → Select Windows PowerShell (Admin) or Windows Terminal (Admin)
- Type this command and press Enter:
powershell
Get-MpComputerStatus | Select-Object AntivirusSignatureVersion, AntivirusSignatureLastUpdated, AntivirusSignatureAgeThis returns:
- AntivirusSignatureVersion: The exact definition version number
- AntivirusSignatureLastUpdated: Precise date and time of last update
- AntivirusSignatureAge: How many days old your definitions are
Three Easy Ways to Update Security Signatures Manually
Method 1: Using Windows Security (Simplest Option)
This is the easiest path for most people. No technical knowledge needed.
Step-by-step:
- Open Windows Security app
- Click Start button
- Type “Windows Security”
- Click the app to open it
- Navigate to virus protection settings
- In the left sidebar, click Virus & threat protection
- Look for the section labeled Virus & threat protection updates
- Trigger the update check
- Click the button that says Check for updates
- Windows will now contact Microsoft’s servers
- Wait for completion
- This typically takes 30 seconds to 2 minutes
- The screen will show progress or a completion message
- You’ll see “Your security settings are being reviewed” or “Virus definitions are up to date”
- Verify the update worked
- Check the Last update timestamp—it should show today’s date and current time
- Note the Antivirus version number (compare to your previous check if you took notes)
When to use this method:
- You’re comfortable using the GUI
- You have internet access
- You manage just one or two computers
- You prefer visual confirmation
Time required: 2–3 minutes total
Method 2: Using PowerShell Commands (Fastest & Most Reliable)
PowerShell is Windows’ built-in command system. This method is faster than clicking through menus and works great for multiple updates.
Step-by-step:
- Open PowerShell as Administrator
- Right-click Start menu
- Select Windows PowerShell (Admin) or Windows Terminal (Admin)
- Click Yes when Windows asks for permission
- Run the update command
Type this command and press Enter:
powershell
Update-MpSignatureThat’s it. Windows begins downloading and installing the latest definitions. You’ll see minimal output, which is normal—no news is good news here.
- Monitor progress (optional)
If you want to watch what’s happening behind the scenes:
powershell
Update-MpSignature -AsJob
Get-Job | Receive-Job
The -AsJob flag runs the update in the background and shows you real-time progress.
- Verify the update completed
After waiting 30 seconds to 2 minutes, verify:
powershell
Get-MpComputerStatus | Select-Object AntivirusSignatureVersion, AntivirusSignatureLastUpdatedThe timestamp should show your current date/time.
Advantages of PowerShell method:
- Faster than GUI (no clicking required)
- Perfect for automation (can script updates across 100 computers)
- Scriptable (save as .ps1 file and run weekly)
- Detailed output for troubleshooting
- Works in Server editions (Core installations without GUI)
Time required: 1–2 minutes total
Method 3: Command Prompt Command-Line Tool (Legacy Option)
Windows Defender includes a command-line management tool. This is older but still fully functional.
Step-by-step:
- Open Command Prompt as Administrator
- Right-click Start menu
- Select Command Prompt (Admin) or Windows Terminal (Admin)
- Click Yes for permission
- Run the signature update command
Copy and paste this entire line:
cmd
"%ProgramFiles%\Windows Defender\MpCmdRun.exe" -SignatureUpdatePress Enter. The system will fetch and apply the latest definitions.
- Check status after update completes
cmd
"%ProgramFiles%\Windows Defender\MpCmdRun.exe" -GetFilesThis shows which definition files are installed and their versions.
When to use this method:
- You’re working with older scripts or batch files
- PowerShell isn’t available in your environment
- You need to script updates on legacy systems
- IT teams have standardized on CMD for automation
Time required: 1–2 minutes total
Method 4: Offline Updates (For Computers Without Internet)
If your PC has no internet access (air-gapped systems, isolated networks), you’ll need to download definitions on a connected computer, transfer them, then install.
How Offline Updating Works
- On a connected computer:
- Visit Microsoft’s Defender update page
- Download the latest definition package for your OS (Windows 10 or 11)
- Download for your processor type (x86, x64, or ARM64—usually x64)
- Save the .exe file to USB drive
- Transfer to offline computer:
- Insert USB into offline PC
- Copy the .exe file to the desktop or Downloads folder
- Install the definitions:
- Double-click the downloaded .exe file
- Follow any installation prompts
- Restart if prompted
- Verify installation:
- Open Windows Security
- Check Virus & threat protection settings
- Timestamp should reflect today’s date
Where to Download Offline Packages
Official Microsoft sources (safe):
- Microsoft Update Catalog — Search for “Windows Defender” or “Windows Malicious Software Removal Tool”
- Microsoft Defender Antivirus updates — Official definition download page
- Windows Update servers via WSUS (for enterprise)
Never download from:
- Third-party file sites (CNET downloads, Soft32, etc.)
- P2P file sharing networks
- Random forum links
Why this matters: Malicious actors sometimes host fake security updates. Downloading from Microsoft’s official servers eliminates this risk.
Quick Reference: Comparison of All Update Methods
| Update Method | Ease of Use | Speed | Best For | Requires Internet | Scriptable |
|---|---|---|---|---|---|
| Windows Security app | Very easy | 2–3 min | Home users, single PC | Yes | No |
| PowerShell command | Moderate | 1–2 min | Admins, multiple PCs | Yes | Yes |
| Command Prompt tool | Moderate | 1–2 min | Legacy systems, scripts | Yes | Yes |
| Offline package download | Moderate–Hard | 5–10 min* | Air-gapped PCs, isolated networks | No | No |
*Includes time to download on another computer and transfer via USB
Understanding What “Security Signatures” Actually Means
Let’s demystify the jargon. When Microsoft talks about “signatures,” they mean:
Definition 1: Malware Fingerprints
Just like fingerprints identify people, malware signatures identify specific malicious programs. A signature is a digital “fingerprint” of a virus, worm, trojan, or other threat.
Example: When a new ransomware variant appears, Microsoft’s security team analyzes it, creates a signature, and adds it to the definition database. When you update, your Defender learns what this new threat looks like.
Definition 2: Behavior Heuristics
Beyond exact matches, modern Defender uses behavior analysis. “If a program tries to modify system files and hide from the user, it’s probably malicious.” These behavioral rules also update with signature packages.
Definition 3: Cloud-Based Protection
Beyond your local definitions, Defender queries Microsoft’s cloud database in real-time. This means even if your local definitions are slightly old, cloud protection catches emerging threats.
The bottom line: Updating signatures arms your antivirus with the latest threat intelligence.
Troubleshooting: When Updates Fail or Show Errors
Updates usually work seamlessly, but connectivity issues or conflicts can cause problems.
Problem 1: “Update Failed” Error or Endless Checking
Symptoms:
- Stuck on “Checking for updates…”
- Error message when update completes
- Last update timestamp doesn’t change
Solutions (try in order):
- Check internet connection
- Open a browser and visit microsoft.com
- If the site doesn’t load, your PC can’t reach Microsoft’s servers
- Check your WiFi/ethernet connection, or restart your router
- Disable third-party firewalls temporarily
- Open Windows Defender Firewall (Start → type “Firewall” → click it)
- Check if third-party security software (Norton, McAfee, Kaspersky) is running
- Temporarily disable them (check their menus, or uninstall if conflicting)
- Try update again
- Restart Windows Update service
- Open PowerShell as Admin
- Run:
powershell
Restart-Service -Name wuauserv, WinDefend- Wait 30 seconds, try update again
- Repair system files
- Open PowerShell as Admin
- Run:
powershell
sfc /scannow- This scans and repairs Windows core files
- Takes 10–20 minutes
- Restart when complete
Problem 2: Proxy or Network Policy Blocking Updates
Symptoms:
- Works at home but not at work
- Error mentions “proxy” or “network policy”
Solutions:
- Check proxy settings
- Start → Settings → Network & Internet → Proxy
- Note any proxy server address
- If blank, proxy isn’t your issue
- If proxy is listed:
- Contact your IT department—they may need to add Microsoft’s update servers to the proxy whitelist
- Domains to allow:
update.microsoft.com,download.microsoft.com,*.windowsupdate.com
- Home network fix:
- Restart your router
- Sign out of WiFi and reconnect
- Try Windows Security update again
Problem 3: Corrupted Defender Installation
Symptoms:
- All troubleshooting above didn’t work
- Defender crashes when you try to update
Solutions:
- Reset Defender (advanced)
- Open PowerShell as Admin
- Run:
powershell
Repair-MpSignature- This rebuilds the signature database from scratch
- Restarts Defender automatically
- Offline reinstall (nuclear option)
- Download Windows Malicious Software Removal Tool from Microsoft
- Run it to completely reset antivirus components
- Restart computer
- Use Windows Security to update normally
Best Practices: Keeping Your Definitions Current (Not Just Once)
One manual update helps, but ongoing protection requires a strategy.
For Home Users (Recommended Setup)
- Keep automatic updates enabled (this is the default)
- No action needed—updates happen automatically each day
- Windows runs updates in the background, so you won’t notice
- Check manually once a month
- Open Windows Security
- Click Virus & threat protection → Check for updates
- Takes 2 minutes
- Ensures nothing got missed
- Run a full scan quarterly
- Start → Windows Security → Virus & threat protection → Scan
- Choose “Full scan”
- Run this on a weekend when you don’t need your computer
- Takes 30 minutes to 2 hours depending on hard drive size
For IT Administrators (Multiple PCs)
- Create a PowerShell update script
powershell
   # Save as UpdateDefenders.ps1
   Get-Computer | ForEach-Object {
       Invoke-Command -ComputerName $_ -ScriptBlock {
           Update-MpSignature
       }
}- Runs updates on all network computers at once
- Schedule weekly using Windows Task Scheduler
- Monitor definition age across your network
- Use Group Policy to centrally manage updates
- Set up reporting to track which computers fall behind
- Flag any PC with definitions older than 7 days
- Test updates before rolling out organization-wide
- Update test machines first
- Wait 24 hours for stability verification
- Then push to production machines
- Keep device drivers updated alongside security updates
- Outdated drivers can interfere with update processes
- Maintain Windows device drivers to prevent compatibility issues with security software
- Monthly driver audits prevent silent compatibility breaks
Important: Manual Updates Don’t Replace Automatic Updates
Critical concept: Manual updates are a supplement, not a replacement.
Think of it this way:
- Automatic updates = constant background protection (preferred)
- Manual updates = emergency or management tool (backup)
Never disable automatic updates because you plan to update manually. Here’s why:
- Manual updates require your attention
- If you forget one week, your definitions grow old
- Automatic updates never forget
- Microsoft releases updates daily
- Even if you manually update weekly, you’ll miss 6 days of new threat data
- Automatic updates catch every single release
- Background protection is always running
- Automatic updates work while you sleep, work, game, etc.
- You get protection without lifting a finger
The right approach: Keep automatic updates on, and use manual updates only when:
- Automatic failed (troubleshooting)
- You need immediate updates (after infection scare)
- You manage many computers (scripting/scheduling)
- You’re on an isolated network (offline download + manual install)
FAQ:
Why Do I Need to Update Windows Defender Signatures?
New malware appears daily. Security signatures are the antivirus’s threat database. Without updates, Defender can’t recognize new threats. It’s like a burglar alarm that only knows how to stop 2020 criminals—completely useless against 2026 attack methods.
How Often Does Microsoft Release Security Signature Updates?
Multiple times per day (often 10+ updates daily). That’s why automatic updates matter. Manual monthly checks catch only a fraction of releases.
Can I Update Defender Without Internet Access?
Yes. Download the definition package on a computer with internet (from Microsoft’s official servers), transfer via USB, and install on the offline PC. Takes 5–10 minutes total.
What If My Antivirus Update Gets Stuck?
Try these in order:
- Check internet connection
- Restart Windows Update service (PowerShell:
Restart-Service wuauserv, WinDefend) - Temporarily disable third-party firewalls
- Repair system files (
sfc /scannow) - Download and install offline package if all else fails
Should I Manually Update Every Day or Just Weekly?
Daily is unnecessary—automatic updates handle this. A manual check every 4 weeks is fine for home users. Administrators might run weekly scripts for network management.
Detailed Pros & Cons of Manual Updating
Advantages You Gain
| Pro | Real-World Scenario | Impact |
|---|---|---|
| Immediate control | You suspect malware infection and want protection NOW, not tonight | Updates your PC within 2 minutes, not waiting for automatic background process |
| Works offline | You manage servers in a secure facility with no internet | Download definitions once, install on multiple isolated machines |
| Scriptable automation | You’re an IT manager with 200 PCs | One PowerShell script updates all 200 PCs simultaneously overnight |
| Troubleshooting tool | Automatic updates keep failing due to network issues | Manual method helps pinpoint exactly where the problem is |
| Schedule control | You’re running a business and want updates during maintenance windows, not business hours | Schedule updates for 2 AM instead of random times during work |
Disadvantages to Consider
| Con | Real-World Scenario | Mitigation |
|---|---|---|
| Requires your action | You manually update once monthly but forget half the time | Set a reminder on your phone, or just leave automatic updates on |
| You might miss releases | Manually updating once a week means you miss 6 days of updates | Automatic updates never miss—they run daily |
| Risk of errors | You typo a PowerShell command and accidentally break something | Use copy-paste to avoid mistakes; Windows Security GUI is foolproof |
| Network blocks updates | Your workplace proxy/firewall blocks signature download | Contact IT department; they can whitelist Microsoft’s update servers |
| Scaling challenges | You’re a small IT shop managing 50 PCs and manual scripting gets complex | Use Group Policy (Active Directory) to centralize management |
Outbound Resources & References
Official Microsoft Resources:
- Microsoft Defender Antivirus Definition Updates (Support Article) — Official guide covering manual update methods, definition packages, and troubleshooting from Microsoft’s support team.
- Microsoft Update Catalog (Definition Downloads) — Direct download source for offline definition packages, monthly rollups, and security updates.
- Windows Security & Maintenance Guide (Microsoft Learn) — Comprehensive developer/admin reference for Defender API, Group Policy settings, and enterprise deployment.
These are curated from Microsoft’s official domains—the only trustworthy sources for security software.
Scenario-Based Guide: When to Use Each Method
Scenario 1: You’re a Home User with One PC
Recommended approach:
- Keep automatic updates enabled (set and forget)
- Monthly: Open Windows Security and click “Check for updates” (insurance check)
- After an infection scare: Use PowerShell
Update-MpSignaturefor immediate refresh
Why: Automatic updates do 99% of the work. Monthly manual check takes 3 minutes and gives peace of mind.
Scenario 2: You’re an IT Professional Managing 50+ PCs
Recommended approach:
- Enable automatic updates on all machines (baseline protection)
- Create a PowerShell script scheduled to run weekly (enforces consistent update timing)
- Set up reporting to alert you if any PC is >7 days behind on definitions
- Test script on 3–5 machines before rolling out organization-wide
Sample script:
powershell
# Weekly Defender Definition Update
Get-ADComputer -Filter * | ForEach-Object {
    Invoke-Command -ComputerName $_.Name -ScriptBlock {
        Update-MpSignature
        Get-MpComputerStatus | Select-Object PSComputerName, AntivirusSignatureVersion
    }
}
Scenario 3: You Have an Air-Gapped Network (No Internet)
Recommended approach:
- Designate one “update machine” with internet access
- Download definition packages monthly from Microsoft Update Catalog
- Transfer via USB to the offline network
- Deploy to all offline PCs using batch scripts or manual installation
Why: Offline networks can’t reach Microsoft’s servers, so downloads are the only option. Monthly refreshes keep protection current.
Scenario 4: Automatic Updates Are Blocked by Policy
Recommended approach:
- Verify with your IT department why updates are blocked (sometimes it’s intentional for stability)
- Request they whitelist Microsoft update servers:
update.microsoft.com,download.microsoft.com - If they won’t unblock, use offline definition packages (scenario 3)
- As fallback, manually update via Windows Security app once weekly
Why: Policy blocks are often mistakes. Once corrected, automatic updates work. If intentional, manual methods ensure you still get protection.
Pre-Update Checklist: Before You Start
Before running any update (manual or automatic):
- Back up important files — If you suspect malware, backup important documents to external drive first
- Note current time — So you can verify the update actually completed by checking timestamps
- Ensure stable internet — Wired internet is better than WiFi (more reliable)
- Close other programs — While updating, close browsers, email, etc. (less chance of interference)
- Don’t interrupt the update — Let it complete fully before restarting
- Verify after completion — Check that Last Update timestamp changed
Post-Update: Next Steps for Maximum Protection
After your manual update:
- Run a quick scan (5 minutes)
- Windows Security → Virus & threat protection → Quick scan
- This leverages your fresh definitions to catch anything currently on your PC
- If you suspect malware, run a full scan (30 minutes to 2 hours)
- Windows Security → Virus & threat protection → Scan options → Full scan
- Scan your entire hard drive with updated definitions
- Consider offline scanning if infection is suspected
- Use Windows Defender Offline (separate bootable environment that runs before Windows loads)
- Found in: Settings → Update & Security → Windows Security → Virus & threat protection → Manage settings → Windows Defender Offline
- Keep automatic updates enabled going forward
- Don’t disable automatic updates after doing this
- They’re your ongoing safety net
Maintaining Driver Compatibility Alongside Security Updates
Here’s something many people miss: outdated drivers can block security updates. If your network card driver is broken or ancient, Windows can’t download the latest definitions.
Check and update your Windows device drivers alongside your security updates. A monthly driver audit—especially network, chipset, and USB drivers—prevents most update failures.
Why this matters:
- Network drivers control your internet connection (needed for definition downloads)
- USB drivers handle external drives (needed for offline definition installs)
- Chipset drivers affect system stability (occasionally interfere with antivirus)
Summary: The Quick Start Guide
For home users (using Windows Security GUI):
- Start → Windows Security
- Virus & threat protection → Check for updates
- Wait 2–3 minutes
- Done
For admins (using PowerShell):
- Right-click Start → Windows PowerShell (Admin)
- Run:
Update-MpSignature - Verify:
Get-MpComputerStatus | Select AntivirusSignatureVersion, AntivirusSignatureLastUpdated - Done
For offline systems:
- Download definition package from Microsoft’s official server (on a connected PC)
- Transfer to USB
- Run .exe file on offline PC
- Restart if prompted
- Done
Related Guides & Further Reading
- How to Manually Update Device Drivers on Windows (Complete Guide) — Keep your network and chipset drivers current so security updates work smoothly. Driver conflicts are a common hidden cause of update failures.
- How to Run Windows Defender Full Scan (Deep Malware Check)
- Windows Security Troubleshooting: When Antivirus Fails to Start
- Using Windows Sandbox for Testing Suspicious Files Safely
- Group Policy Editor Guide: Centralizing Defender Across Your Network
Final Safety Reminder
Windows security signatures are one piece of your protection puzzle—important but not the whole picture. A complete security approach includes:
- Updated definitions (what you just learned) ✓
- Updated operating system and applications
- Strong passwords (14+ characters, unique for each site)
- Two-factor authentication on important accounts
- Regular backups of important files
- Avoiding phishing emails and suspicious downloads
- Using a VPN on public WiFi networks
Combine these layers and you’ve got genuine protection against modern threats.
Manual signature updates are your power tool for taking control of your PC’s security when you need it most. Now you know exactly how to use it.